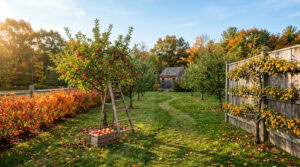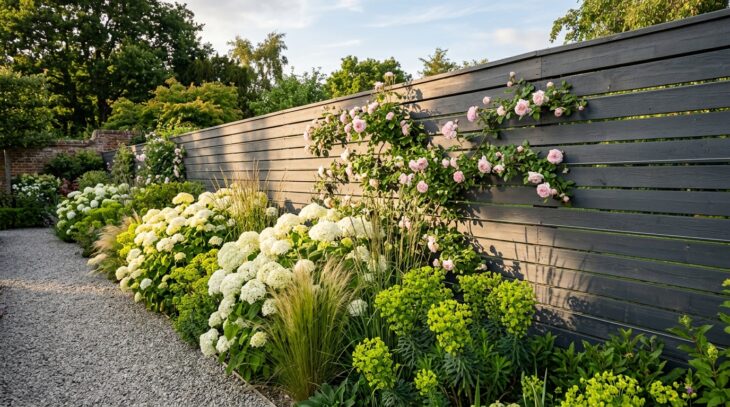
A fence is usually the largest single object in a garden and almost always the least considered. It is put up by a contractor in a day, in the orange-brown timber it came in, and then it sits there for fifteen years being the first thing anyone sees. Change the fence and you change the entire backdrop that every plant in your garden is seen against.
Contents
- 01. Paint It a Dark Colour
- 02. Horizontal Slat Fence
- 03. Hit and Miss Fence for Windy Sites
- 04. Angled Louvre Screen
- 05. Add a Trellis Topper for Extra Height
- 06. Woven Hazel Hurdles
- 07. Grow a Living Willow Fence
- 08. A Picket Fence for the Front Garden
- 09. Post and Wire Where the View Is Worth Keeping
- 10. Gabion Baskets as a Boundary
- 11. Corten Steel Panels
- 12. Bamboo Screening
- 13. Green the Whole Fence With Climbers
- 14. Espalier Fruit Against the Boundary
- 15. Plant a Hedge in Front of It
- 16. Pleached Trees Above the Fence Line
- 17. Hang a Shelf of Pots on It
- 18. Fix a Mirror to Double the Garden
- 19. Cut a Window Into the Fence
- 20. Build a Bench Into the Fence
- 21. Light It From Below
- 22. Leave a Gap at the Bottom for Wildlife
- 23. A Reclaimed Timber Fence on a Budget
- 24. Use the Fence as a Backdrop, Not a Feature
- 25. Get the Posts Right, Because That Is What Fails
The 25 ideas below cover the whole range: proper carpentry, cheap fixes, and the plant-based approach where the fence quietly disappears behind something green. Some are about privacy, which is the reason most people go looking in the first place. Others are about making a fence you already have look like it was chosen rather than delivered.
Start with the paint idea and the climber idea if your budget is small, since between them they will change more than a new fence would. If you are replacing the whole boundary, read the last idea first, because the posts are what fail and everything else depends on them.
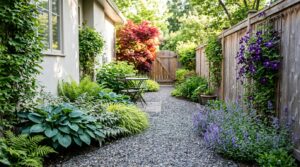
01. Paint It a Dark Colour
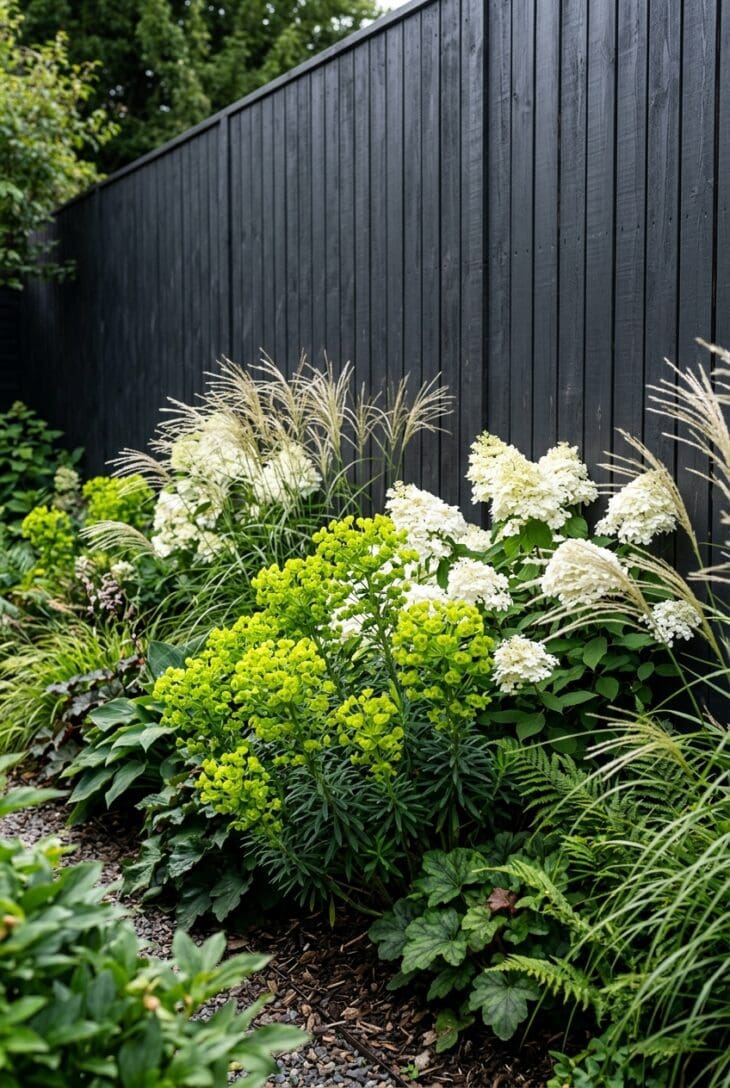
What you see A fence painted so dark it is nearly black, and in front of it a border that suddenly looks twice as good: lime-green euphorbia, white hydrangea heads and pale grasses all seem to be lit from within. The fence itself has stopped being a thing you notice. It has become a backdrop, and the plants are the picture.
Why it works Orange-brown fence timber is a warm, mid-toned colour that competes with foliage and shouts about where the boundary is. A dark, cool, near-black colour does the opposite: it falls back visually, so the eye reads depth rather than a wall, and it puts maximum contrast behind pale flowers and light green leaves. It is the cheapest transformation in this entire article and it takes one weekend.
How to get it Choose a dark cool grey, charcoal or a black-green rather than a warm brown. Avoid mid-greens, which fight with the planting, and avoid the fashionable dark blue-greys unless the rest of your garden agrees with them. Use an opaque garden paint (not a translucent preserver) and apply it with a sprayer if you value your weekend, or a 4in (100mm) block brush if you value the neighbours’ patio. Two coats, on dry timber, ideally before you plant the border in front of it. Expect to recoat every five to seven years, which is why doing it before the climbers go on is worth thinking about.
02. Horizontal Slat Fence
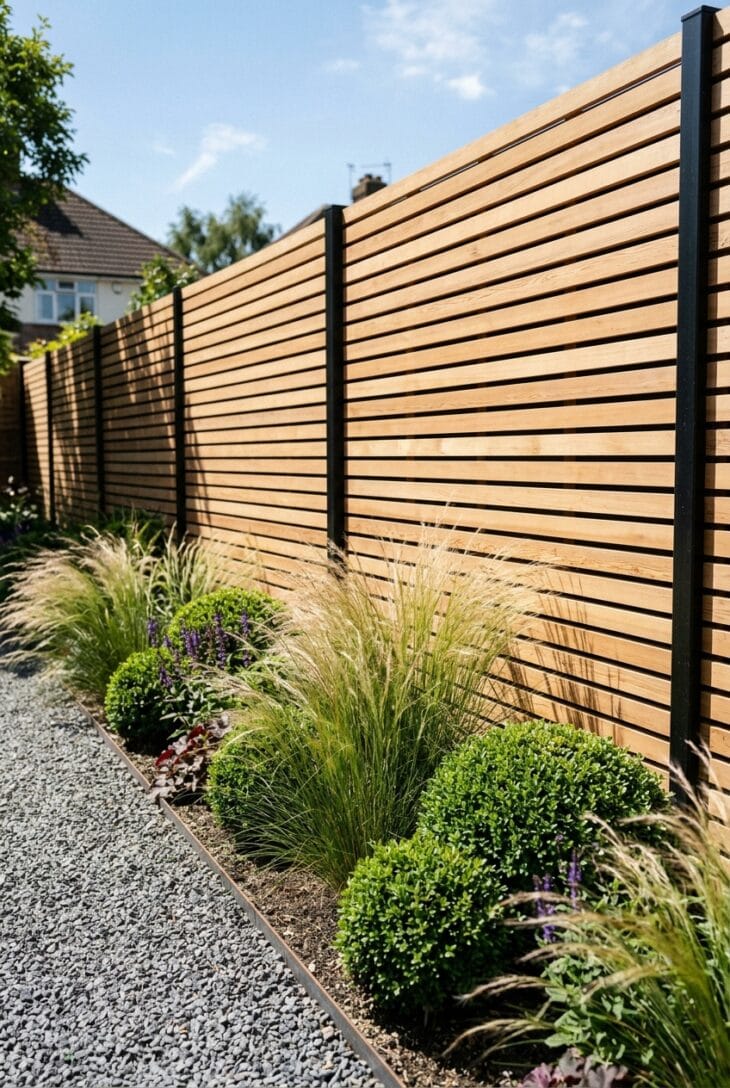
What you see Evenly spaced horizontal slats in warm cedar, with a narrow dark gap between each one, running the length of the boundary. The lines are perfectly level and they carry the eye sideways. In front, grasses and clipped domes. It looks like architecture rather than fencing.
Why it works Horizontal lines widen a space, which is why this is such a useful move in a long narrow garden: the fence visually pushes the boundaries apart. The small gaps do something subtler, letting slivers of light and glimpses of green through so the fence reads as a screen rather than a solid wall, without giving up any real privacy. It is the signature boundary of most modern garden ideas.
How to get it Use a stable timber that will not twist, since a warped slat is instantly visible on a horizontal run: western red cedar, thermally modified ash or good-quality treated softwood, planed, in lengths that span between posts without joints. Slats of 4 to 6in (10 to 15cm) deep with a 1/2in (12mm) gap is the classic proportion. Fix them to posts at 6ft (180cm) centres maximum, and use a spacer block so every gap is identical, because the eye reads the gaps, not the boards. Note the one real drawback: a horizontal fence is a ladder, so it is a poor choice on a boundary where security matters.
03. Hit and Miss Fence for Windy Sites
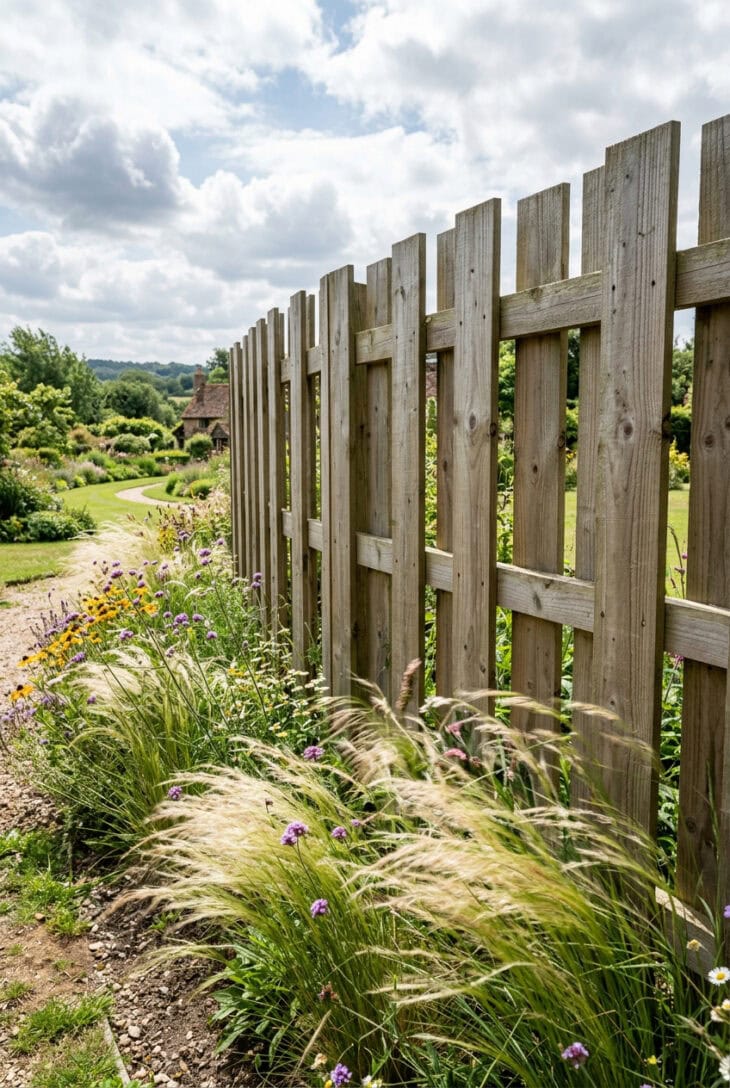
What you see A fence that looks solid when you stand square to it and turns into a series of gaps as you walk along. The boards are fixed alternately to the front and the back of the rails, so they overlap without touching. The grasses in front are moving, but gently, because the wind is coming through the fence instead of over it.
Why it works A solid fence does not stop wind; it launches it. Air piles up on the windward side, accelerates over the top, and drops into a damaging turbulent eddy on the very side you were trying to shelter, which is why plants behind a solid fence get flattened. A permeable fence that lets roughly half the air through slows the wind on both sides and gives real shelter for a distance of up to ten times its height. It also looks identical from both sides, which makes it the diplomatic choice for a shared boundary.
How to get it Fix vertical boards alternately to the front and back faces of horizontal rails, with each board overlapping its neighbours by about 1in (25mm) so you cannot see straight through, but air still can. Aim for roughly 50% permeability, which is the sweet spot for shelter. Use 6 x 1in (150 x 25mm) boards on rails at top, middle and bottom, and expect to use about 30% more timber than a closeboard fence, which is the honest cost of it. It is the right boundary for exposed and coastal gardens, where a solid panel would simply be found in the next field.
04. Angled Louvre Screen
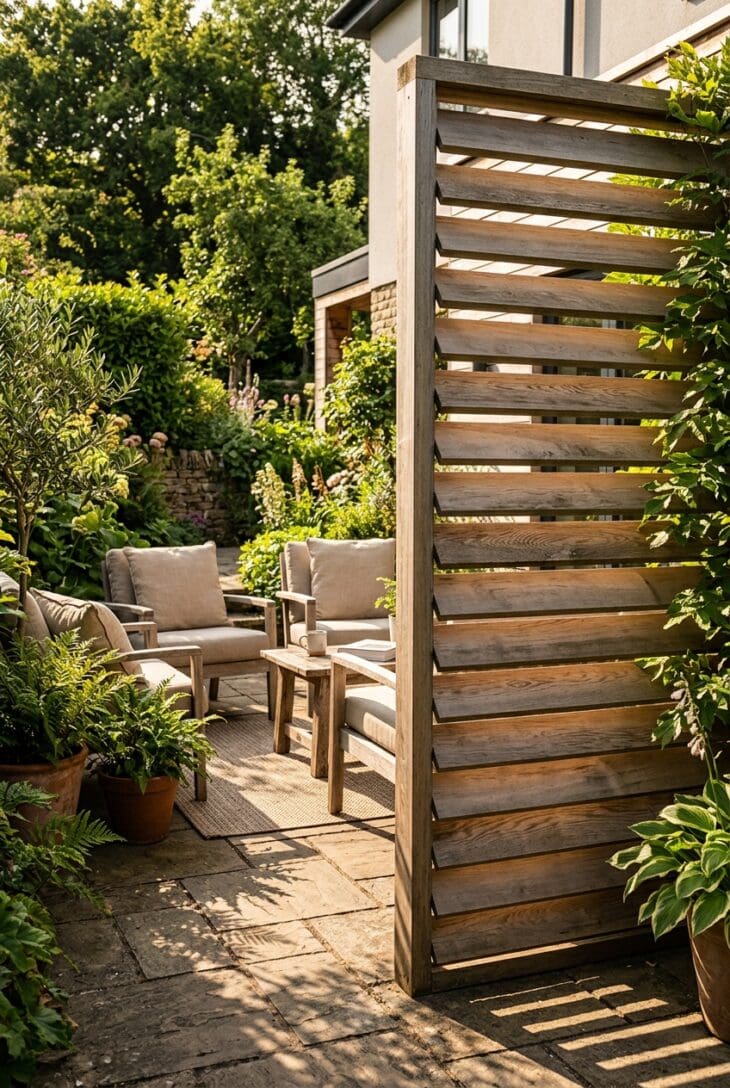
What you see A screen of slats set at an angle rather than flat, tilted so that from the neighbouring window they close up into a solid face, while from where you are sitting they open and let light and air straight through. The sun comes through at a slant and stripes the patio.
Why it works Privacy is directional, and this is the only idea here that exploits that properly. By tilting the slats, you choose which sightline to block, typically the upstairs window next door, while keeping the screen open to the sky and to the light. You get the privacy of a solid fence without the gloom of one, which is exactly what a patio seating corner needs.
How to get it Work out the sightline first, by standing at the seat and looking back at the window you want to block, then set the slat angle to close that line and nothing more. A 45-degree tilt is the usual answer. Rout angled grooves into the posts, or fix small angled cleats, and drop the slats in. Use 4 to 6in (10 to 15cm) slats with the same dimension as the gap, and remember to check the effect from your neighbour’s side too, since a louvre that hides you completely from them may look aggressively blank from their garden. Louvres collect leaves, so build them where you can reach both faces.
05. Add a Trellis Topper for Extra Height
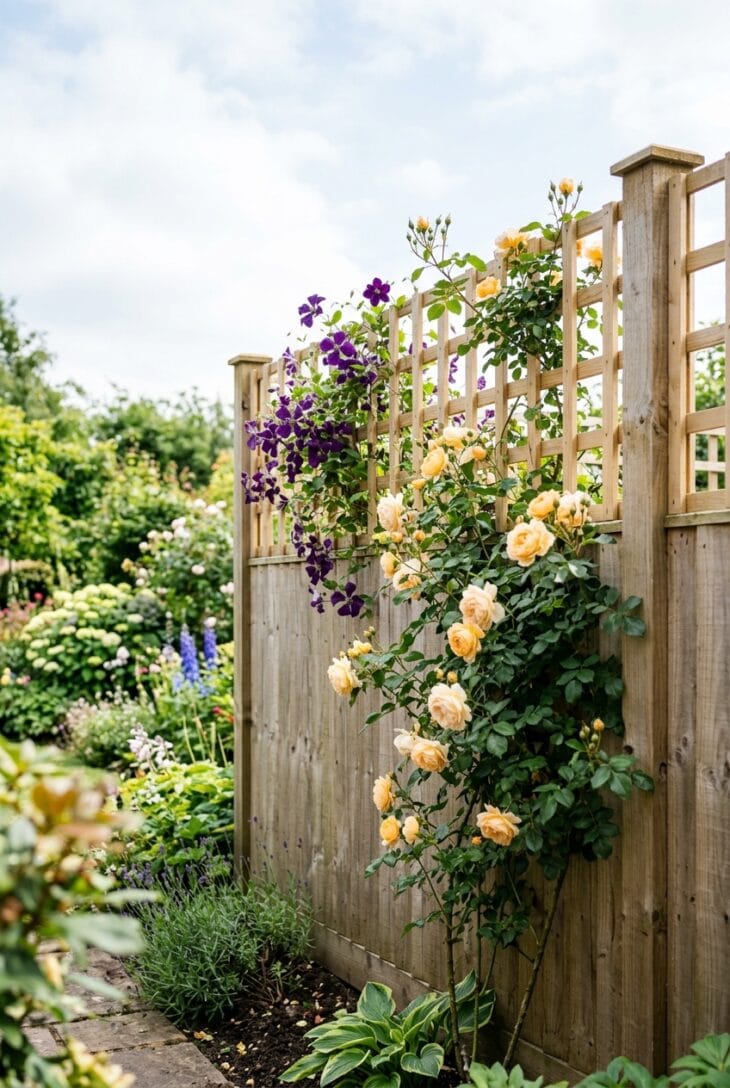
What you see An ordinary fence with a foot or two of open square trellis added along the top, and a clematis threading through it. The extra height is there, but you can still see sky through it, so the boundary has grown without closing in. From the seating area, the trellis and its climber are all that stand between you and the neighbour’s window.
Why it works Most places cap fence height at around 6ft (180cm) without permission, and a solid 6ft fence is often just short of what you need. Open trellis is the loophole in visual terms as well as sometimes in planning terms (check your local rules, since they vary): it adds height while reading as air, and once a climber is through it, the screening is real. Solid boards to the same height would feel oppressive and would cast a genuine shadow.
How to get it Check your local height limit before you build, since in many places anything over 6ft (180cm), including the topper, needs consent. Use a proper heavy square trellis (1 1/2in / 38mm battens), not the flimsy diamond stuff, which sags within two seasons. The posts are the weak point: a topper adds sail area, so either use longer posts from the start or bolt a steel post extender to each existing post, and never nail a topper to the top of a fence panel and hope. Plant a clematis (Clematis viticella ‘Etoile Violette’) or a climbing rose at the base and lead it up.
06. Woven Hazel Hurdles
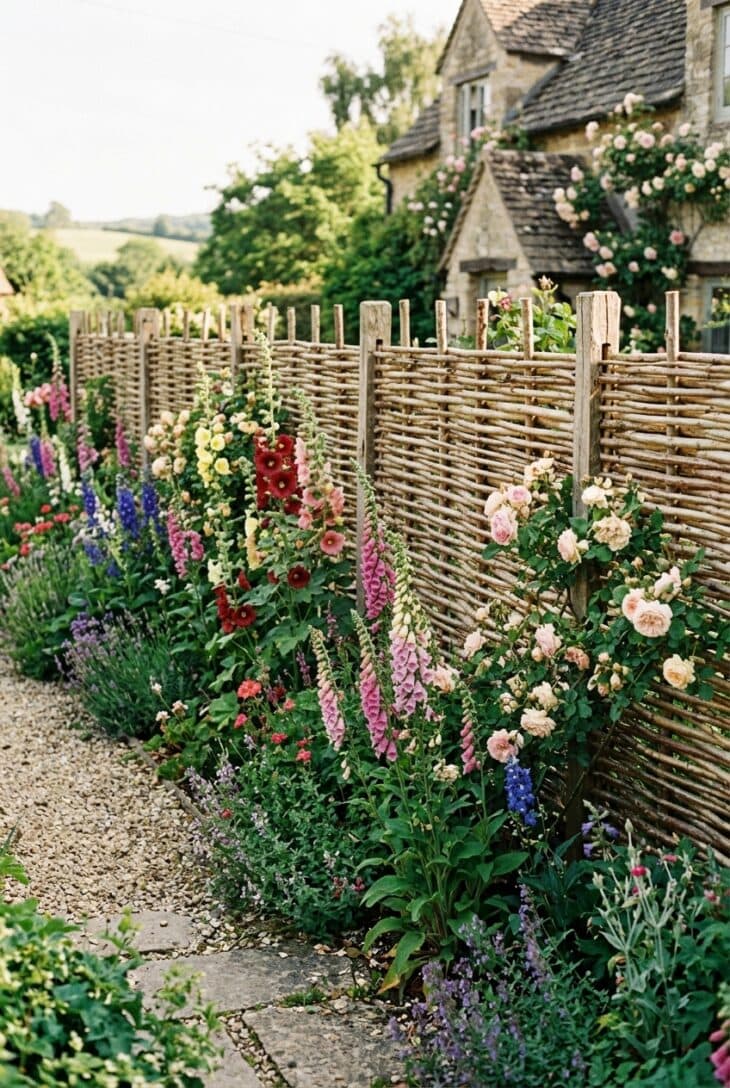
What you see Panels of woven hazel, the pale rods threaded in and out of upright sails, making a warm brown boundary with a handmade texture you want to touch. Hollyhocks and foxgloves lean against it. It looks like it grew there, which in a sense it did.
Why it works Hazel is the correct backdrop for soft, informal, old-fashioned planting, because its texture is at the same scale as the plants in front of it. It is also genuinely sustainable: hurdles are made from coppiced hazel, a crop that is cut on a seven-year cycle and regrows, and the coppicing itself is one of the best things you can do for woodland wildlife. In a cottage garden nothing else looks so obviously at home.
How to get it Buy from a hurdle maker rather than a shed, since machine-made imports use thinner rods and last half as long. Be honest about the lifespan: a good hazel hurdle gives you seven to ten years, not thirty, so use it where the look matters more than permanence, for internal divisions and short boundaries rather than the whole plot. Fix the hurdles to sturdy driven posts, ideally sweet chestnut, and keep the bottom rod at least 2in (5cm) clear of the soil, because contact with wet ground is what rots them first. They are light and slightly translucent, so they screen without shading.
07. Grow a Living Willow Fence
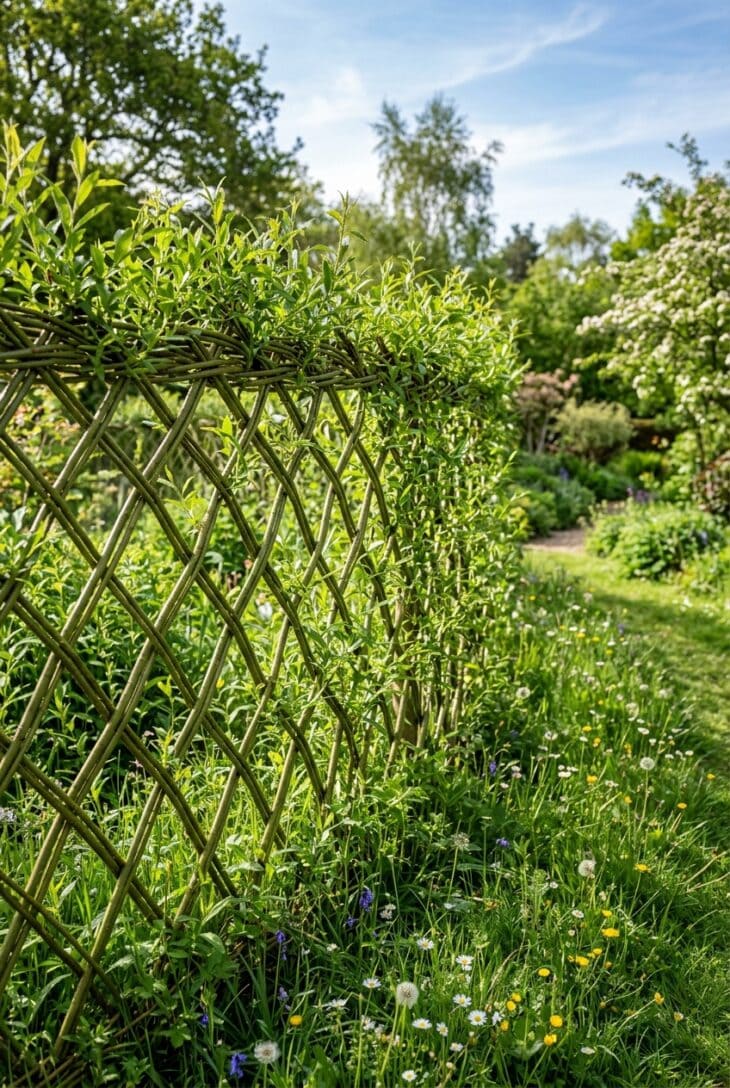
What you see A diagonal lattice of willow rods, planted straight into the ground and now in leaf, so the fence is sprouting. In winter it is a woven screen of bare purple-brown stems; in summer it is a wall of green. It is the only fence in this list that is alive and that you have to cut rather than repair.
Why it works Willow (Salix spp.) roots from a cut stem pushed into damp soil, with no rooting hormone, no pot and no fuss, which means an entire fence can be made from bundles of rods costing very little. It grows into itself: where the rods cross they eventually fuse, and the structure gets stronger every year rather than weaker. And it is genuinely good habitat, which puts it among the most useful wildlife garden ideas for a boundary.
How to get it Order fresh-cut willow rods (Salix viminalis is the standard) in winter, and plant them between December and March while they are dormant. Push each rod 12in (30cm) into the soil at a 45-degree angle, one every 8 to 12in (20 to 30cm), then plant a second row leaning the other way to create the lattice, and tie the crossings. Water heavily in the first summer, since a dry first year kills more than anything else. It needs cutting back hard every winter or it turns into a row of trees, and be careful where you put it: willow roots travel and hunt for water, so keep it well away from drains and foundations.
08. A Picket Fence for the Front Garden
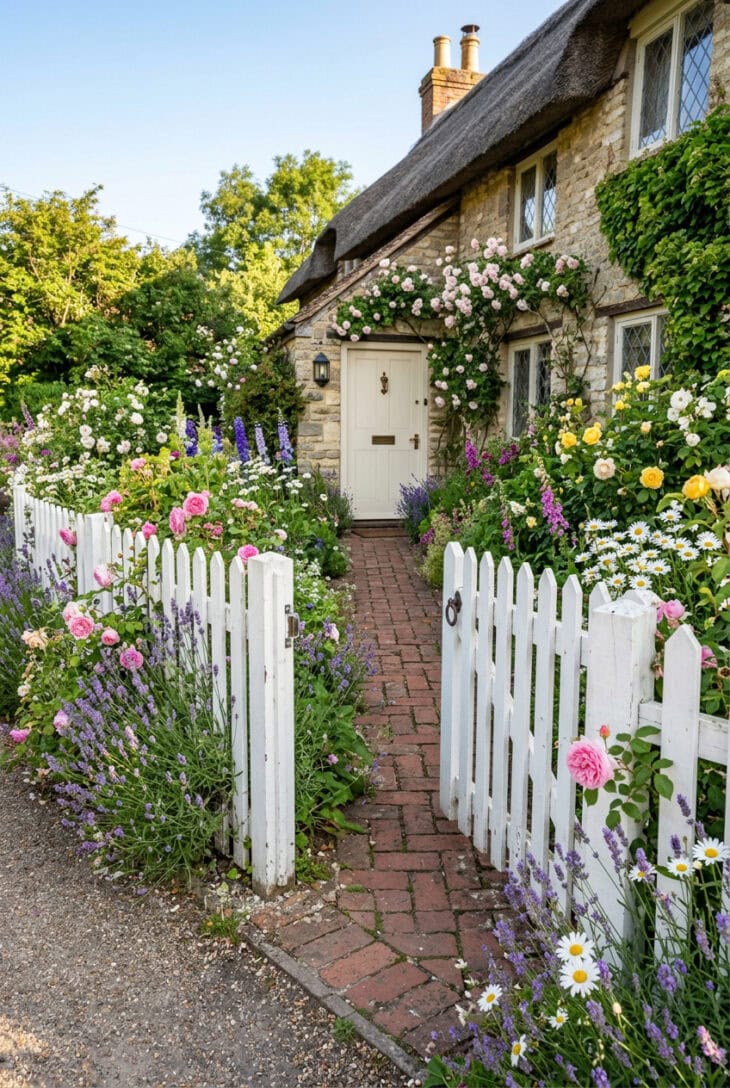
What you see A low white picket fence with a gate, and lavender and roses pushing through the gaps and flopping over the top from the garden side. You can see straight over it. It defines the boundary without defending it, and it makes the front of the house look cared for from fifty feet away.
Why it works A front garden does not want privacy, it wants definition, and those are different jobs. A picket fence draws a clear line between public and private, keeps dogs and small children in, and then gets out of the way visually so the planting can do the talking. The gaps are the point: planting seen through a fence looks far more generous than planting seen above one, which is why this is a staple of front garden ideas.
How to get it Keep it low, 3 to 4ft (90 to 120cm), since a tall picket fence looks like a stockade. Space the pales at about the width of one pale, which is the classic proportion, and point or round the tops so water runs off them (a flat-topped pale rots first). Paint rather than stain, in white, soft grey or a dark green, and be prepared to repaint every three or four years, since that is the true cost of a painted picket fence and the reason so many go grey and sad. Plant English lavender (Lavandula angustifolia ‘Hidcote’) along the inside so it spills through, and check your local rules, which often cap a front boundary at 3ft (90cm) next to a road.
09. Post and Wire Where the View Is Worth Keeping
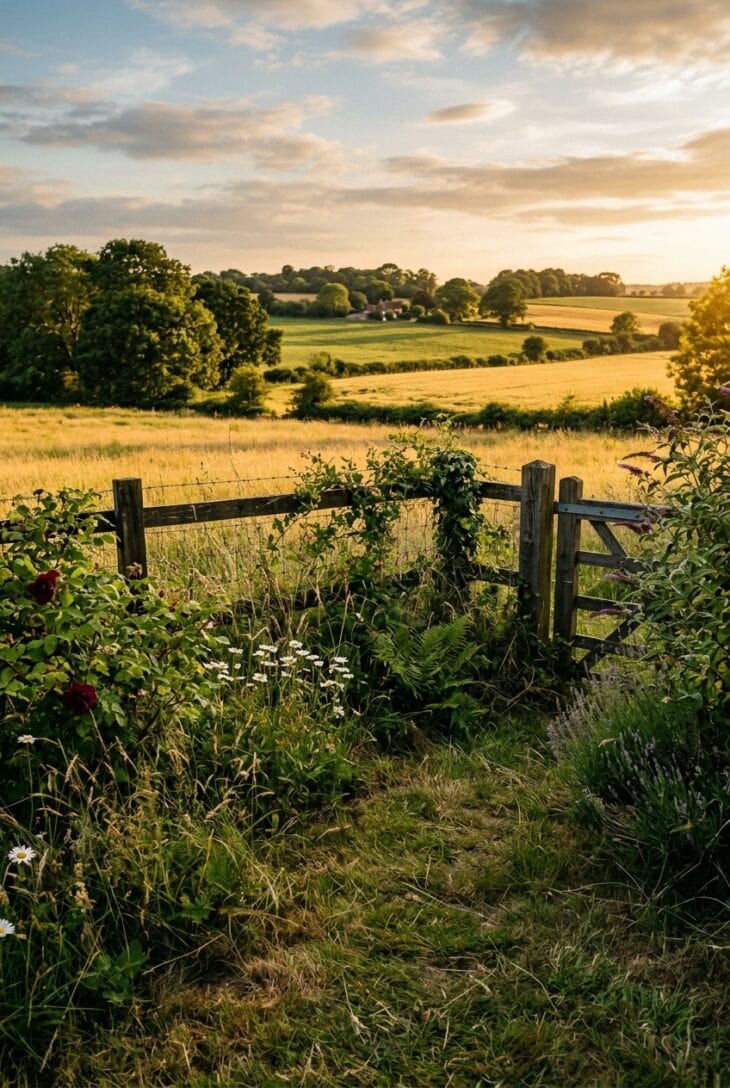
What you see A line of slim dark posts with taut wires between them, and beyond it, fields. From ten feet away the fence has effectively disappeared and the garden simply runs on into the landscape. The boundary is doing its legal job and nothing else.
Why it works If you have a view, the worst thing you can build is a fence. Post and wire keeps stock and dogs where they belong while borrowing the whole landscape beyond as part of your garden, which is free scenery and by far the biggest thing any boundary can give you. Painting or staining the posts a dark colour is what makes them vanish; pale timber posts stay stubbornly visible.
How to get it Use slim posts, no thicker than 3in (75mm), stained dark brown or black, at 8 to 10ft (2.5 to 3m) centres, with straining posts and diagonal braces at each end and at every corner, because a wire fence is only as good as its tension. Run three to five taut galvanised wires, or add a discreet dark stock mesh if you need to hold a dog. Keep the line low, 3 to 4ft (90 to 120cm). Plant sparse, low, informal things in front of it, never a hedge, and resist the urge to add a rail across the top, since that horizontal line is the thing your eye will catch on.
10. Gabion Baskets as a Boundary
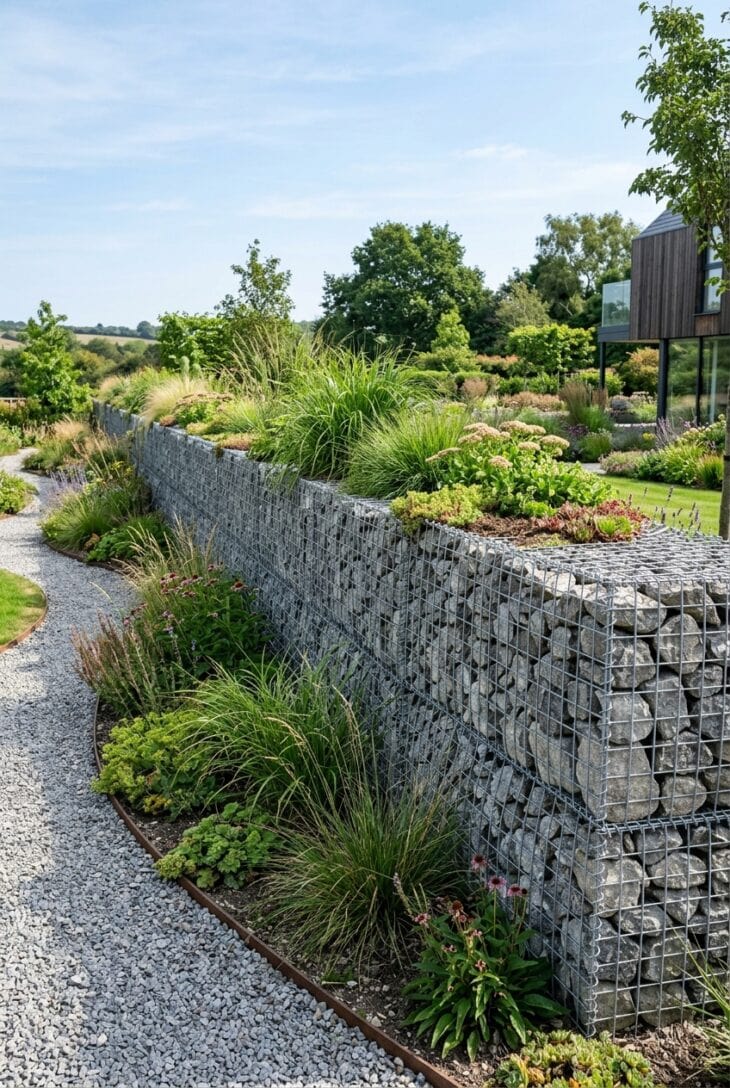
What you see A run of steel mesh cages packed with grey stone, stacked into a solid, textured, industrial-looking wall. Grasses and sedums grow along the top and against the base. Close up it is all detail, hundreds of stones; from across the garden it is one massive, calm block of grey.
Why it works A gabion gives you the mass and permanence of a stone wall without the skill of a stonemason, since you are essentially filling a basket. It needs no mortar and no foundation beyond a compacted base, it drains completely, and it will still be there in fifty years. The gaps between the stones also make excellent habitat for insects, lizards and bumblebees, and it works particularly well as a low retaining boundary on a sloping plot.
How to get it Buy heavy galvanised or PVC-coated baskets, not the thin garden-centre ones, since the wire is what fails. Set them on a compacted hardcore base, not on soil, and tie every basket to its neighbours with the wire supplied. The filling is the craft: hand-place the stones on the visible faces so they sit flat and tight, and shovel rubble into the middle where nobody looks, which halves the cost. Use angular stone 4 to 8in (10 to 20cm) across, big enough not to fall through the mesh. Keep any freestanding run under 3ft (90cm) or get advice, since above that the loading gets serious.
11. Corten Steel Panels
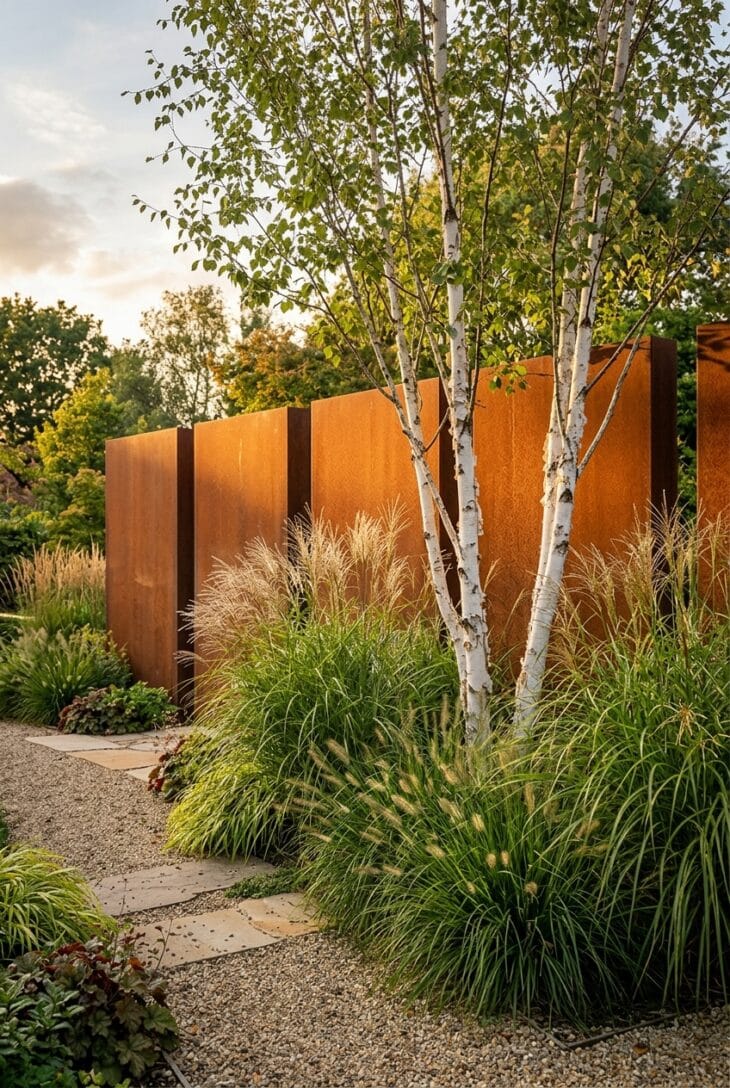
What you see Tall panels of weathering steel, deep orange-brown and slightly velvety with rust, forming a screen. Grasses stand against them and a white-stemmed birch throws shadows across the surface. The colour is extraordinary in low light and it changes with the weather, going darker and richer when it rains.
Why it works Corten rusts on purpose. The oxide layer that forms on the surface is stable and seals the steel underneath, so the fence never needs painting and never rots, and the warm rust colour happens to be the perfect foil for the greens, golds and browns of grasses and prairie planting. It is expensive, so use it as a feature panel or a short screen rather than the whole boundary, where it will earn its keep.
How to get it Buy proper weathering steel rather than mild steel left to rust, which will simply keep rusting until it is gone. Panels want to be at least 3mm thick to stay flat, and they need substantial posts, since steel is heavy. Be aware of the one genuine problem: for the first year or two the rust runs, and it will stain pale paving, so either set corten behind planting, on gravel, or lay a strip of dark stone beneath it. Keep the detailing simple, with a clean shadow gap between panels, and let the material do the talking.
12. Bamboo Screening
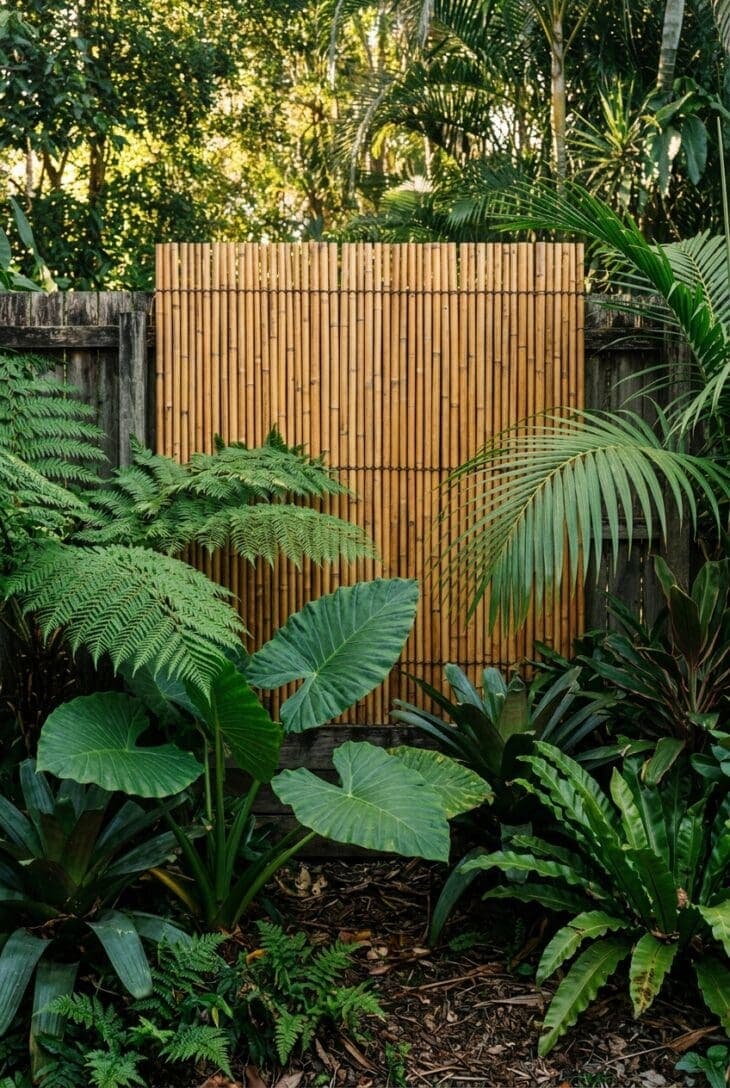
What you see A dense screen of golden bamboo canes, wired together and fixed straight over the top of a tired old fence, with big-leaved foliage and a tree fern in front of it. The tone is warm and honey-coloured. The old fence has vanished and the corner now reads as somewhere considerably further from home.
Why it works This is the classic cover-up: the cheapest way to deal with an ugly but structurally sound fence is not to replace it but to face it. Bamboo screening comes in rolls, goes up in an afternoon with zip ties or staples, and instantly changes the material, colour and texture of the whole boundary. Its warm colour and vertical grain are exactly right behind the bold foliage of tropical garden ideas.
How to get it Buy the thickest canes you can find, since thin split-cane rolls look cheap and last two seasons, while a heavy black-wired cane screen lasts eight or more. Fix it to a fence that is sound, because the screening adds windage and will pull a wobbly fence over. Use galvanised staples or stainless ties every 12in (30cm) along the top, middle and bottom rails, keep the bottom edge 2in (5cm) clear of the soil, and cut it with the wires taped first so the roll does not spring apart. Treat it with a UV-resistant oil every couple of years, or accept that it will weather to grey, which is not a disaster.
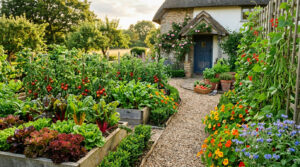
13. Green the Whole Fence With Climbers
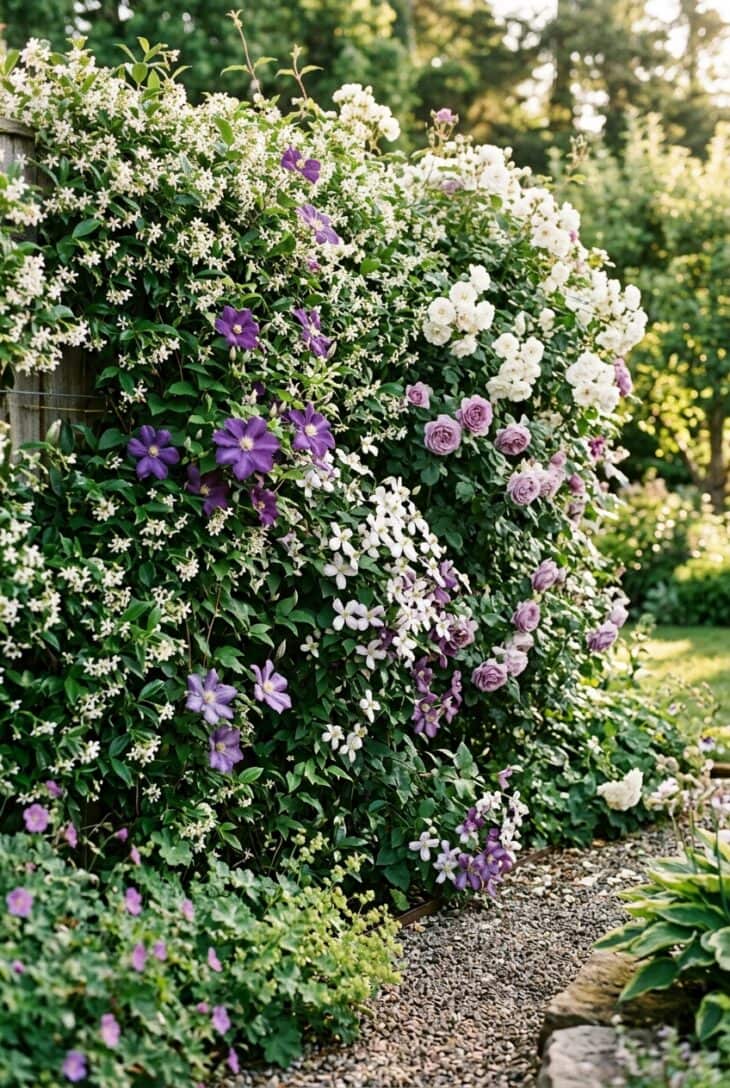
What you see A fence you can no longer see. Star jasmine, clematis and a climbing rose have been trained along wires until the timber has vanished behind a curtain of green scattered with white and purple flowers. On a warm evening the whole boundary smells of jasmine.
Why it works A fence is the biggest surface in a small garden and it is doing nothing. Planting it turns 100 square feet of dead timber into 100 square feet of garden, and it costs a fraction of what replacing the fence would. It is also the cure for a boundary you dislike but cannot change, such as a neighbour’s panel that you are not allowed to touch: you can plant your own side of it.
How to get it Put up the support first, since most climbers cannot cling to a flat fence: run galvanised wire horizontally through vine eyes every 18in (45cm), held 2in (5cm) off the timber so air can circulate. Plant 18in (45cm) out from the base, not against it, because the soil at the foot of a fence is bone dry, and lean the plant in toward the wires. Choose by aspect: star jasmine (Trachelospermum jasminoides) or a climbing rose in sun, climbing hydrangea or winter-flowering honeysuckle for shade. Prune clematis by group (viticella types get cut to 12in / 30cm every February, which is the easiest possible pruning) and expect two or three years before it looks like the picture.
14. Espalier Fruit Against the Boundary
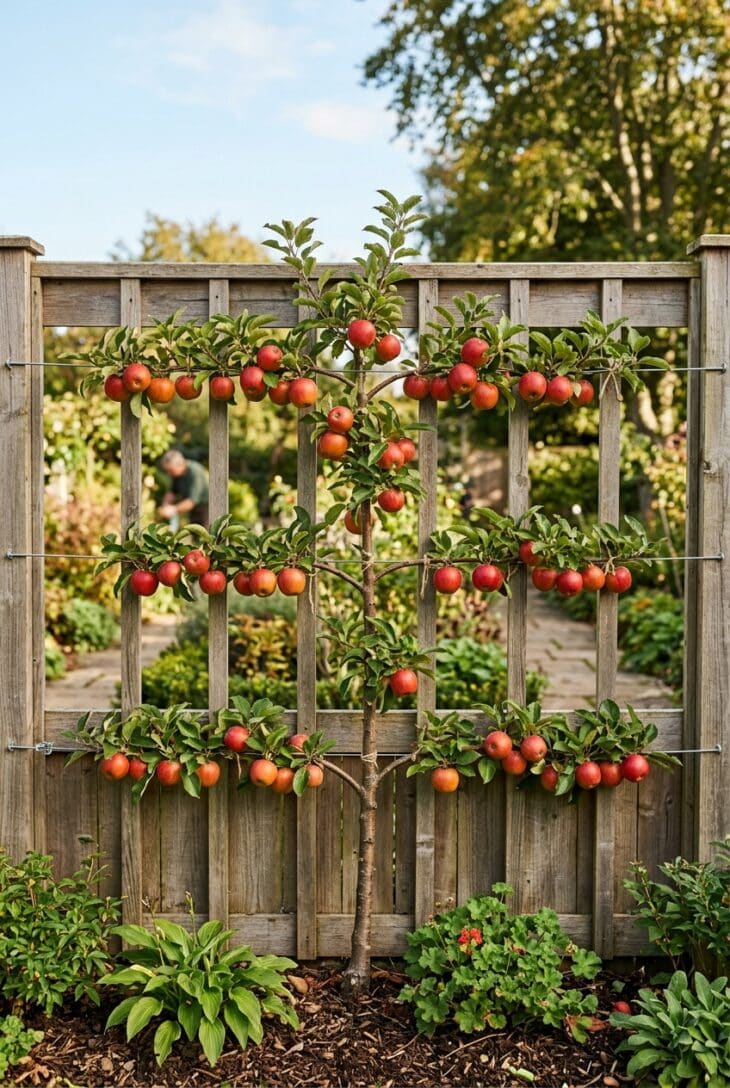
What you see An apple tree pressed flat against the fence, its branches trained into three perfectly horizontal tiers along taut wires, carrying ripening red fruit. It is only 12in (30cm) deep and it is a tree. It is the most satisfying geometry in the garden and it gives you apples.
Why it works An espalier takes a plant that would need 15ft (450cm) of garden and grows it in one foot, which is why this technique was invented for walled kitchen gardens where space was money. Training the branches horizontal is not just for looks: a horizontal branch sets far more fruit bud than a vertical one, so a flat tree crops heavily for its size. Against a warm fence it also ripens earlier, and it makes the boundary itself productive, which is the whole spirit of a productive plot.
How to get it Buy a maiden (one-year-old) apple or pear on a dwarfing rootstock (M26 or MM106 for apples), or pay more for a ready-trained two or three tier tree and skip four years. Fix horizontal wires at 18in (45cm) spacings, tension them properly, and tie in with soft ties, never wire. Cut the leader just above a wire each winter and train the two strongest new shoots out along it, at 45 degrees first, then lower them to horizontal in autumn, since bending a growing shoot straight down stalls it. Prune in late summer, not winter, to keep it flat and fruitful, and choose a self-fertile variety or plant a partner nearby. A sunny fence is ideal; a shaded one will grow a beautiful tree and very few apples.
15. Plant a Hedge in Front of It
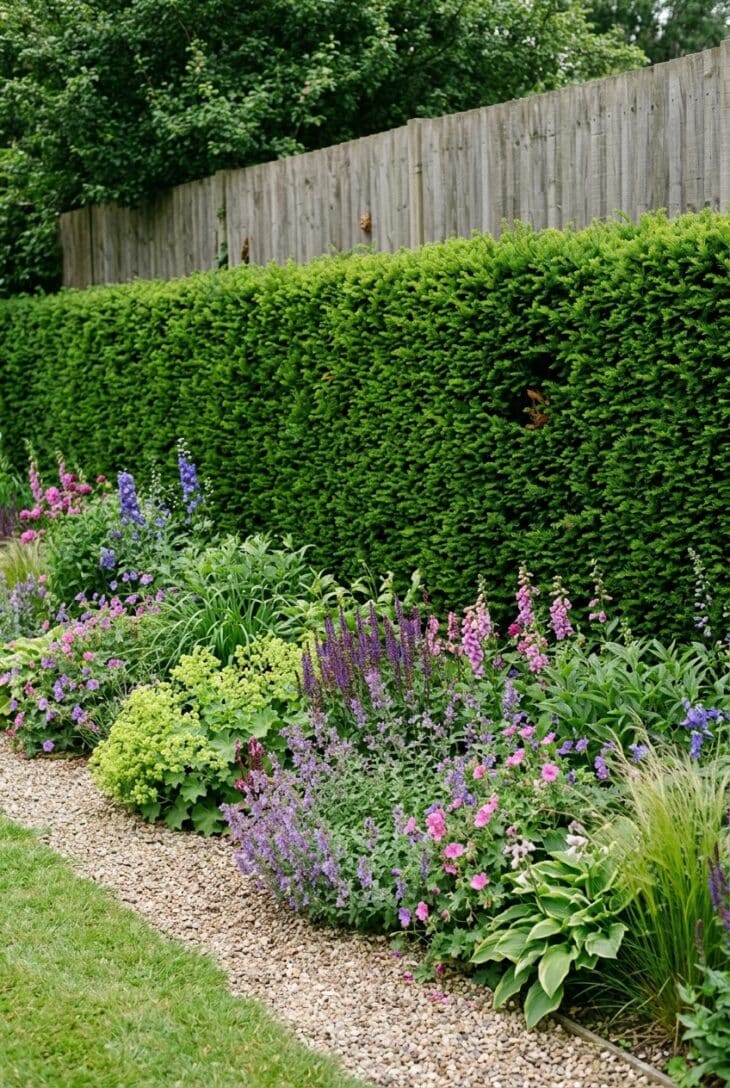
What you see A clipped hedge standing just in front of the fence, dense and dark green, with the timber showing only in glimpses at the base. In front of the hedge, a border. Three layers of depth in what used to be a flat line, and the eye reads the hedge as the edge of the garden.
Why it works This is the best of both: the fence gives you instant privacy and holds the legal boundary from day one, and the hedge gives you the green wall that a fence can never be. A hedge in front of a fence also gets you around height restrictions in most places, since a hedge is planting rather than structure, and it doubles the boundary’s value for wildlife. The cost is depth, so it only works if you can spare the space.
How to get it Plant at least 18in (45cm) clear of the fence so air moves behind the hedge and you can still get in to repair a panel. Choose by what you want: English yew (Taxus baccata) for the best dark evergreen backdrop in existence, clipped once a year; beech (Fagus sylvatica) or hornbeam (Carpinus betulus) for the coppery leaves it holds all winter; hawthorn (Crataegus monogyna) mixed with hazel and holly for a wildlife hedge that flowers and fruits. Plant bare-root whips between November and March, five to a yard (metre) in a single row, and cut the leaders back by a third on planting, which is the step everyone skips and which is what makes a hedge thick at the bottom rather than leggy.
16. Pleached Trees Above the Fence Line
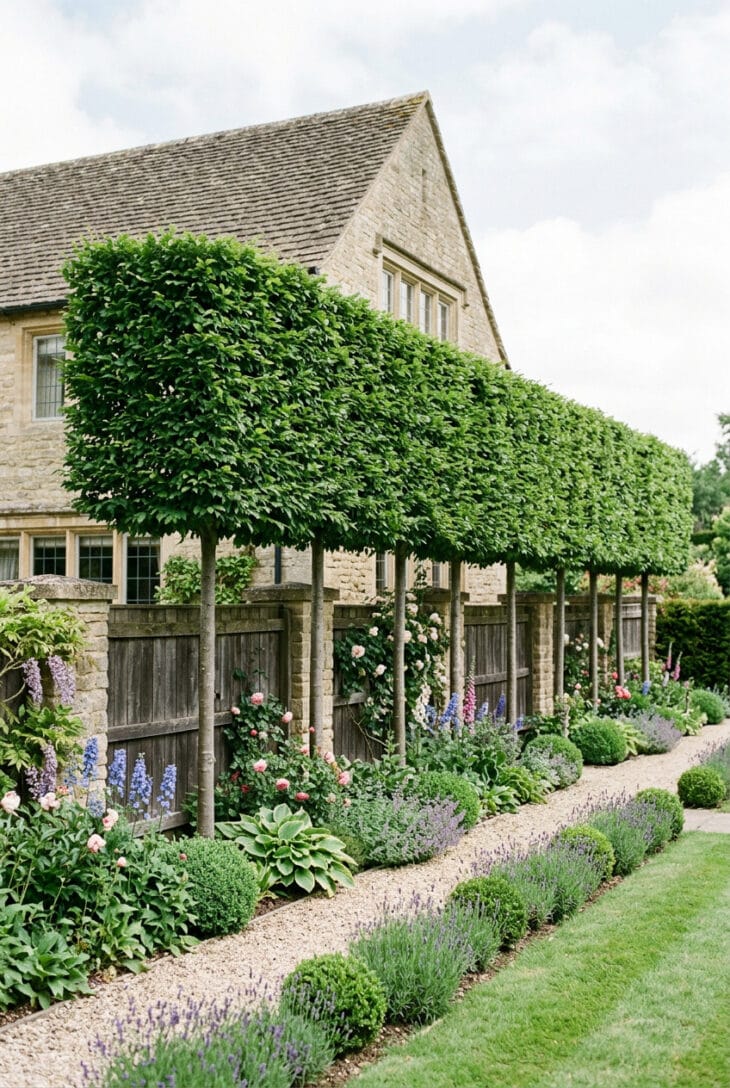
What you see A row of trees with bare, straight, evenly spaced trunks and a flat clipped box of foliage sitting on top of them, like hedges on stilts. The screen floats above the fence, exactly at the height of the neighbour’s upstairs windows. Below the trunks, the border carries on uninterrupted.
Why it works The privacy problem is almost never at ground level, it is the upstairs window looking down at your terrace, and a taller fence cannot solve that: only height can. Pleached trees put the screen precisely where the sightline is and nowhere else, so you gain privacy without losing the light, the space or the border beneath. It is the most elegant answer to the overlooking problem there is, and the most expensive.
How to get it Buy ready-pleached trees with the frame already built, since growing them from scratch takes a decade. Hornbeam (Carpinus betulus), lime (Tilia cordata ‘Greenspire’) and evergreen photinia are the usual choices; hornbeam holds brown leaf through winter, photinia stays fully evergreen. Plant them 6 to 8ft (180 to 240cm) apart so the heads knit together in two or three seasons, with the clear stem height set to match your fence. Water them properly for the first three years, which for a tree this size means a slow soak of several gallons weekly in dry spells, and clip twice a year (June and late August) to keep the box sharp. Check the sightline before you buy by standing where you sit and looking up.
17. Hang a Shelf of Pots on It
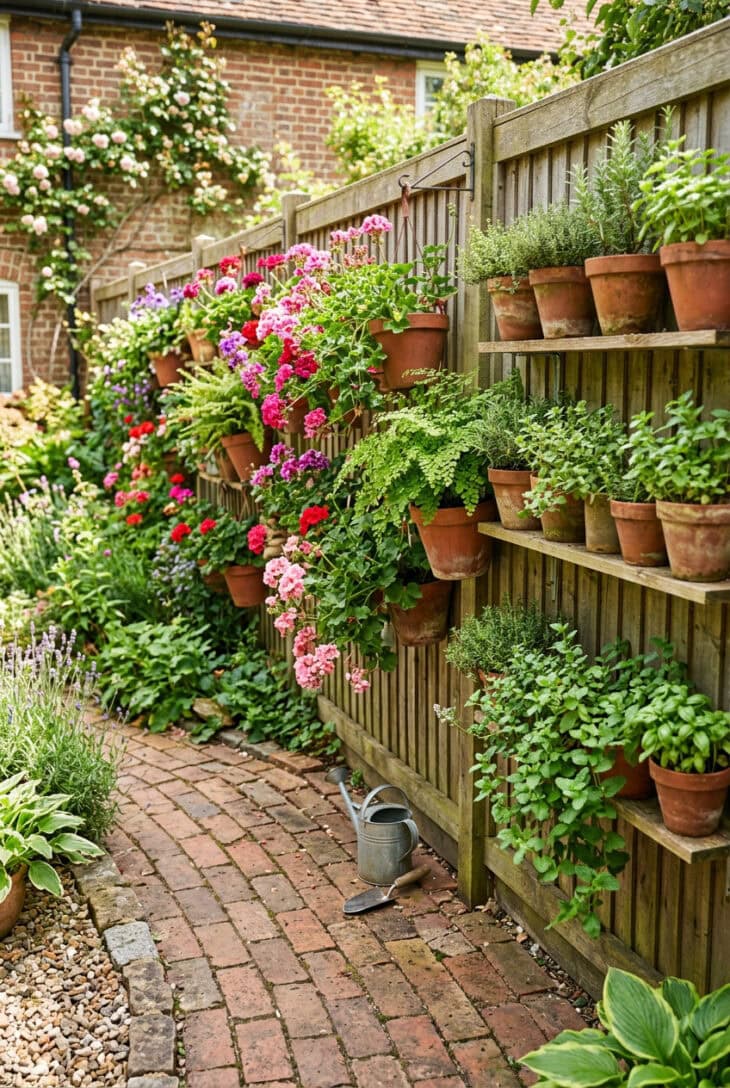
What you see A fence carrying shelves of terracotta pots at three different heights, planted with trailing pelargoniums, herbs and a few ferns for the shady end. Nothing matches and everything is full. It turns a bare panel into the busiest, most productive wall in the garden.
Why it works In a garden with no soil, no borders and no ground to dig, the fence is the only planting space there is, and pots on it are a garden. It is also completely reversible, which matters enormously to renters, since everything unscrews and comes with you. The vertical stacking means a 6ft (180cm) run of fence can hold as many plants as a border ten times its footprint, which is the core logic behind most container garden ideas.
How to get it Fix into the fence posts or rails, never into the thin boards, since a wet terracotta pot is far heavier than people expect and a full shelf will pull a panel apart. Use exterior-grade brackets and stainless screws. Then be realistic about watering: a small pot on a sunny fence can dry out in a single hot day, so use the biggest pots that look right, add water-retaining granules, and put the whole thing on a drip line with a timer if you travel at all. Group in odd numbers, repeat one or two plants throughout for coherence, and keep the shady end for ferns and hostas rather than fighting it.
18. Fix a Mirror to Double the Garden
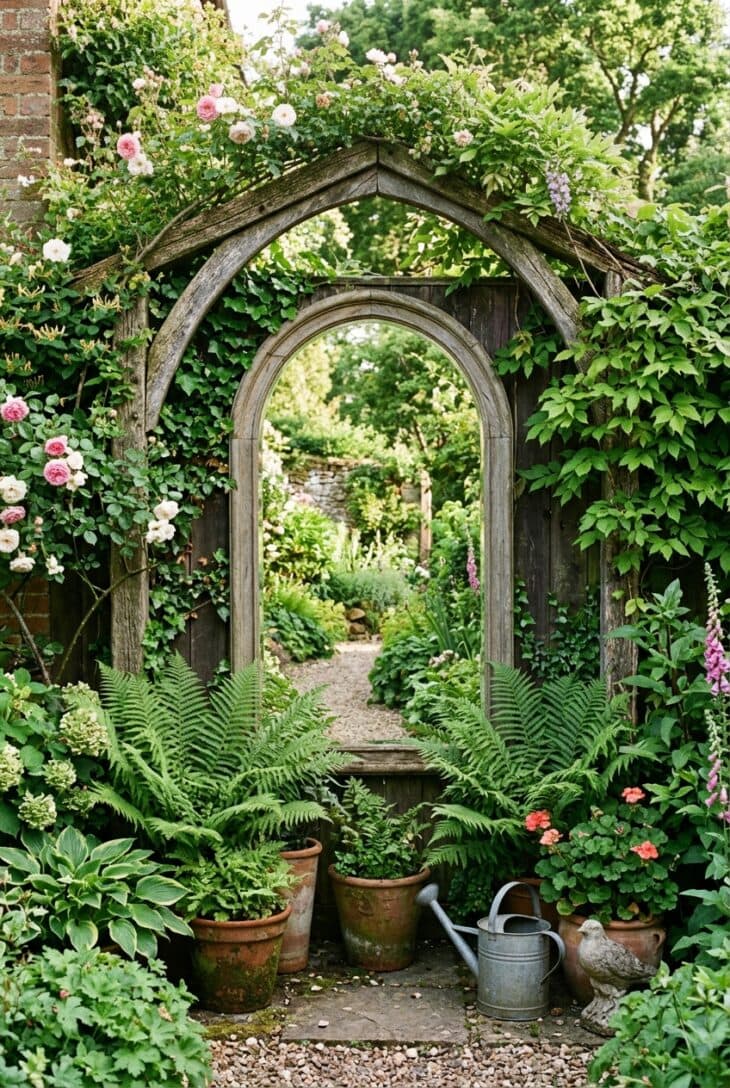
What you see What appears to be an arched opening in the fence, leading through into another green space beyond. Walk toward it and the other space walks toward you, because it is a mirror, framed with an old timber arch and half hidden behind a climber. For a second, every visitor believes it.
Why it works A mirror is the only thing that adds a view to a garden with no view. It doubles light in a dark corner, it doubles the planting in front of it, and if it is framed as an opening it suggests the garden continues, which is the single most valuable illusion available to a small garden. The trick is that it has to be a deliberate feature, since a bare rectangle of mirror screwed to a fence just looks like a bare rectangle of mirror.
How to get it Use exterior-grade acrylic or a proper outdoor mirror, since ordinary glass mirror will de-silver and blacken within two winters. Frame it: an arch, an old window, a gate frame, anything that reads as an opening. Angle it slightly so it reflects planting rather than reflecting you, the house, or the sun straight into a window. Put it in shade or dappled light, never in a spot that catches full sun, since a mirror can scorch plants and it is a genuine fire risk against dry timber. Plant something in front of the lower edge (a fern, a pot, a low shrub) so the join with the ground is hidden, which is what sells the illusion. And take birds seriously: keep it low and shaded, and break the reflection with foliage.
19. Cut a Window Into the Fence
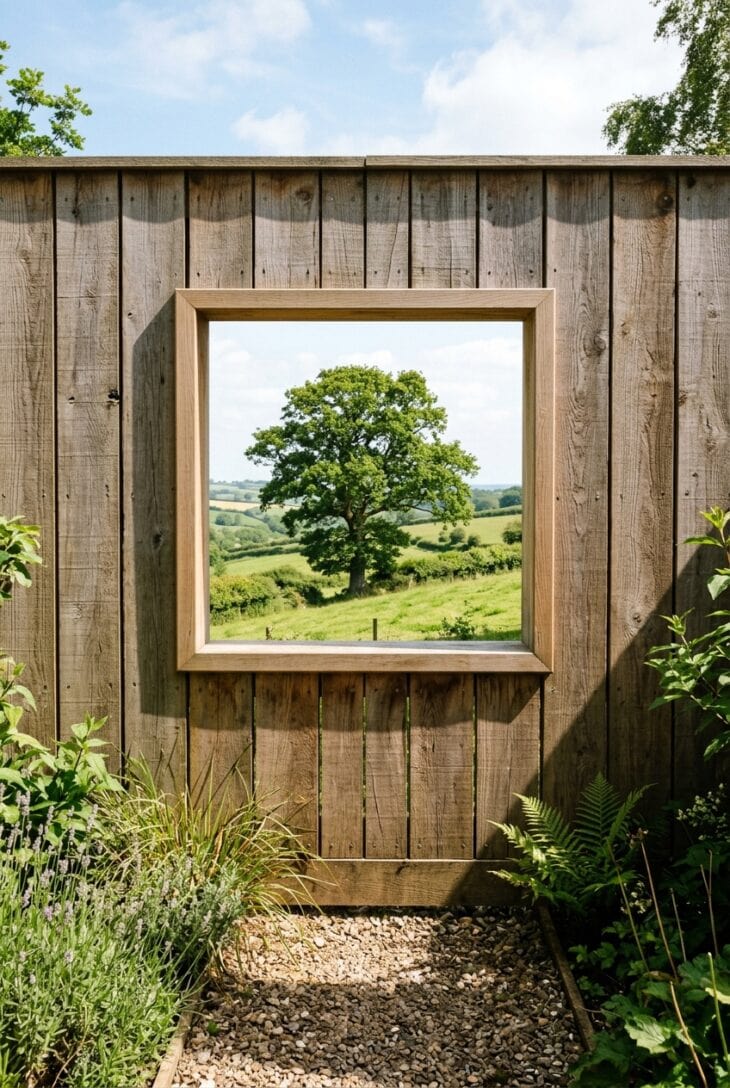
What you see A solid fence with one clean square hole in it, neatly framed, and through the hole a single tree in a field. The fence gives you complete privacy everywhere else. That one opening is where everyone stands.
Why it works A framed view is worth more than an open one, because framing tells the eye what to look at. Cutting a window into an otherwise solid boundary lets you keep the privacy and take the one thing worth seeing, which is a far more sophisticated move than either a solid fence or an open one. It is the same principle as the borrowed landscape in a Japanese garden: edit the view down to its best part and discard the rest.
How to get it Find the view before you cut, by walking the boundary with a cardboard frame held up at eye height until you find something worth framing. It might be a tree, a church tower, or just a gap between two houses full of sky. Cut the opening square and true, and line it with a proper frame of planed timber, mitred at the corners, since a ragged hole looks like damage. Size it modestly, about 18 to 24in (45 to 60cm), because a small aperture concentrates the view. Set the height for a seated viewer if it faces a bench, and add a plain timber sill so rain runs off rather than down the boards.
20. Build a Bench Into the Fence
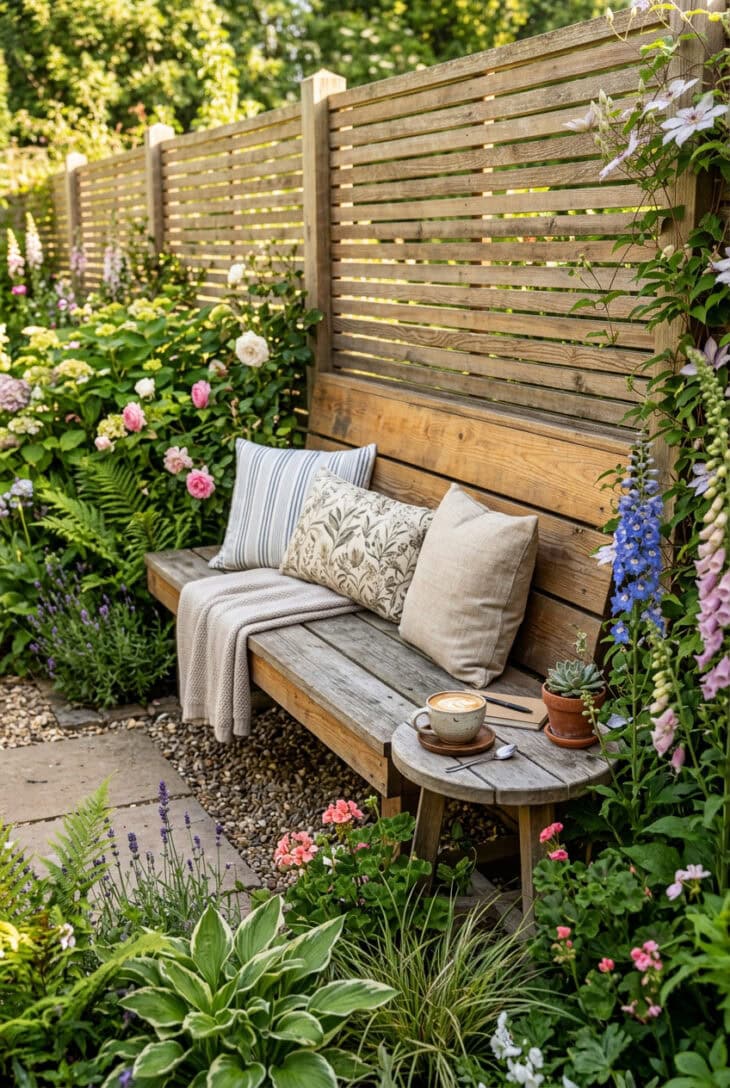
What you see A bench that is part of the fence: same timber, same lines, with the fence itself forming the backrest and the seat cantilevered out of it. Cushions on it, planting crowding in at both ends, a coffee on the arm. It takes up no floor space and it looks built rather than bought.
Why it works Freestanding garden furniture eats floor area, which is the scarcest resource in a small garden, and it always looks like an object dropped into the space. Building the seating into the boundary hands you back the middle of the garden and makes the fence do two jobs at once. The same trick works with a raised planter, a log store or a workbench, since any fence with a decent frame can carry it.
How to get it Do not hang the bench off the fence panels: build it on its own legs or on posts set in concrete, and simply align it so it looks integrated. Seat height 17 to 18in (43 to 45cm), depth 18 to 20in (45 to 50cm), with a slight backward tilt on the seat and a backrest angled about 10 degrees off vertical, which is the difference between a bench you sit on for two minutes and one you sit on for an hour. Leave 1/4in (6mm) gaps between the seat slats for drainage, use the same timber and finish as the fence so the two read as one thing, and put it where the evening sun lands rather than where the space happens to be free.
21. Light It From Below
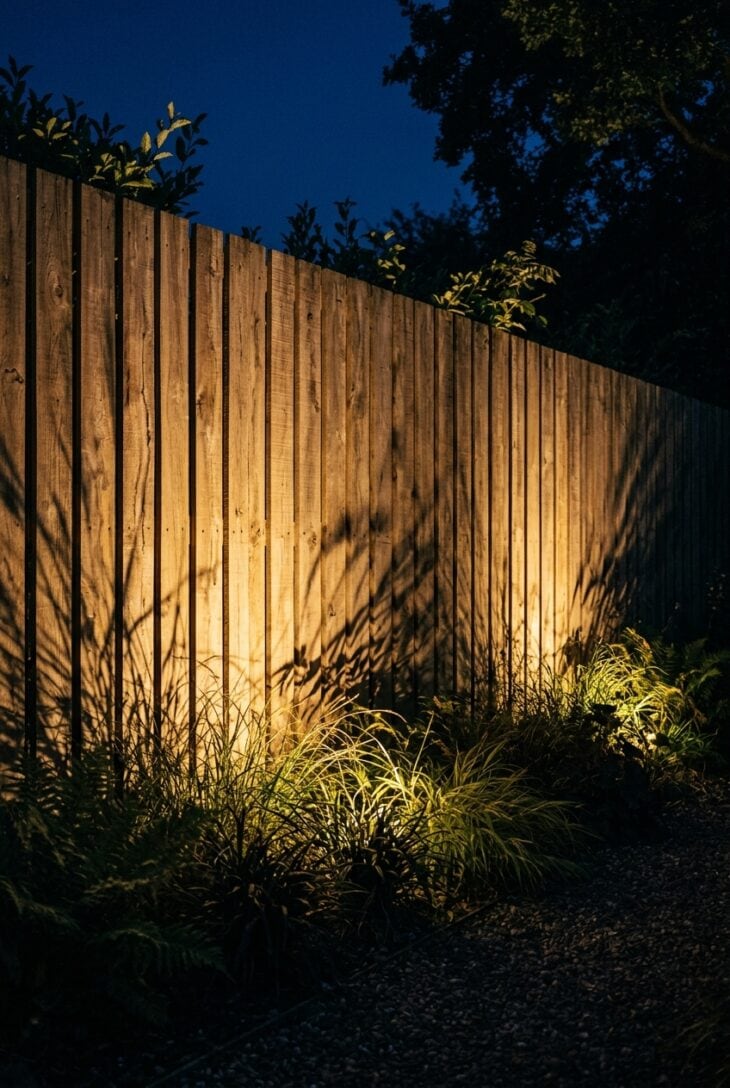
What you see The fence at night, lit from the ground so the light rakes up the boards and picks out every ridge and grain. The shadows of the grasses in front are thrown across it, enormous and moving. The garden has gone black, the fence is glowing, and the whole thing has more drama than it ever has in daylight.
Why it works After dark, the fence is the only surface big enough to light, and lighting a vertical surface is what gives a night garden its sense of size, since a dark boundary reads as a void while a lit one reads as a wall you can judge distance against. Grazing the light along the surface, rather than pointing at it, is what reveals texture: the same fitting aimed straight on would flatten it completely.
How to get it Set low-voltage uplighters 4 to 8in (10 to 20cm) out from the base of the fence and aim them almost straight up, so the beam skims the surface rather than hitting it head-on. Space them evenly, 3 to 5ft (90 to 150cm) apart, and use warm white at 2700K. Do not light the whole boundary, since a fully lit fence looks like a car park: light one section, or one gap between two shrubs, and leave the rest dark. Put something with a strong silhouette in front of a lamp (a grass, a fern, an acer) so it throws a shadow on the boards, which is the part that makes people stop talking and look.
22. Leave a Gap at the Bottom for Wildlife
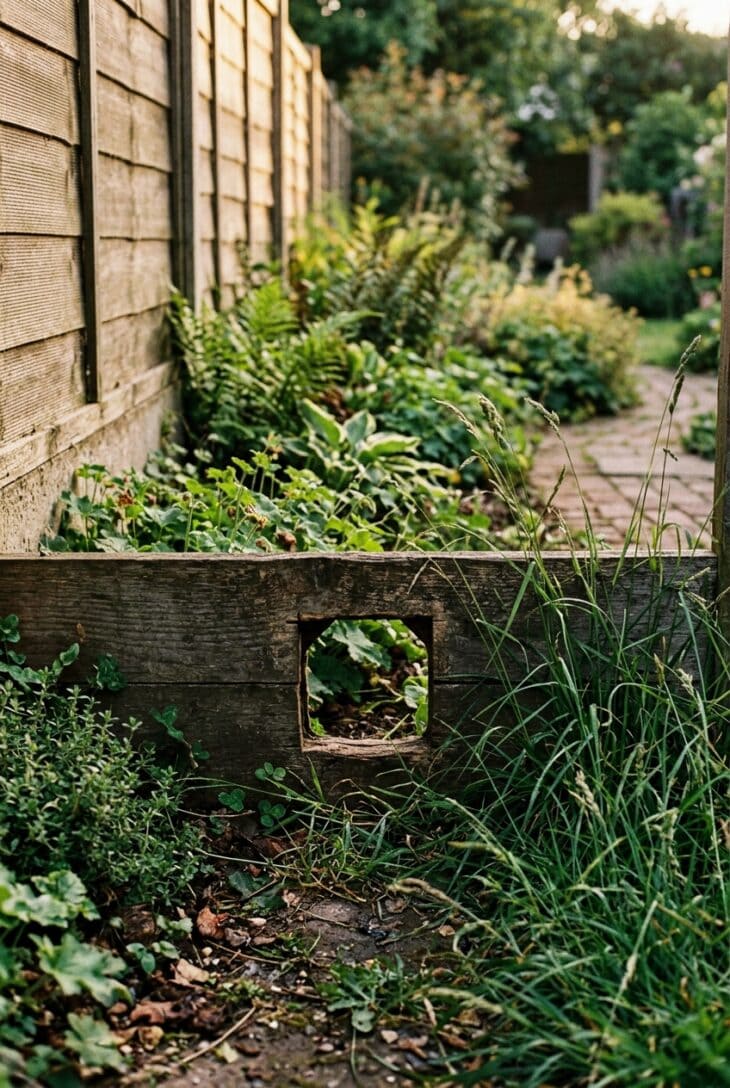
What you see A small square hole, hand-sized, cut through the gravel board at the foot of the fence, with grass and planting either side and the dark of the next garden beyond. It is the least photogenic idea in this article and possibly the most useful.
Why it works Modern fencing has quietly turned neighbourhoods into a grid of sealed boxes. A hedgehog needs to roam over a mile in a single night to find food and a mate, and a continuous run of solid fence with concrete gravel boards means it simply cannot, which is a large part of why their numbers have collapsed. One hole per fence, agreed with your neighbours, reconnects a whole street of gardens into one habitat. It costs nothing and it is the single highest-impact thing on this list.
How to get it Cut a 5 x 5in (13 x 13cm) square at ground level: big enough for a hedgehog, too small for most pets. Cut it through the gravel board or the bottom of a panel, and if the board is concrete, either drill it out or set the board a little higher and pack the gap. Position it in a quiet corner rather than in the middle of a lawn, and lead planting up to it on both sides, since animals prefer to travel under cover. Talk to your neighbours and get them to do the same, because one hole in one fence connects two gardens, but a run of them connects a hundred. Then leave a wild corner, a log pile and a shallow water dish, which is what makes the visit worthwhile once they arrive.
23. A Reclaimed Timber Fence on a Budget
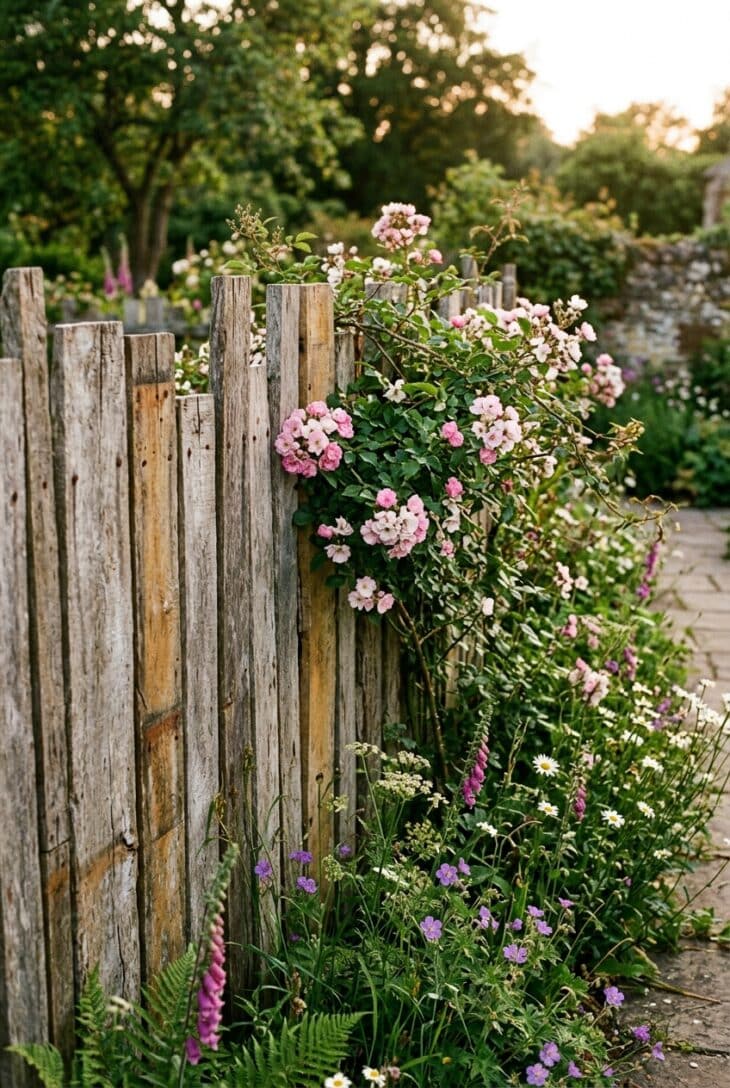
What you see A fence made of boards that have clearly had a previous life: different widths, different weathered greys and faded browns, set in a random vertical rhythm so no two are the same. A rambling rose is going up it. It cost almost nothing and it has more character than any panel you can buy.
Why it works Random widths are the whole design. Reclaimed timber comes in mixed sizes, which is usually treated as a nuisance, and here it becomes the rhythm that stops the fence looking flat. The weathered surface also skips the fifteen years of ageing that a new fence needs before it stops looking new, and old boards are usually slow-grown timber that is denser and more durable than anything sold today.
How to get it Source from a reclamation yard, a demolition, or scaffold boards, which are cheap, thick and take a beautiful grey. Avoid pallets unless you are sure of the treatment, since some are chemically treated and none are durable. Sort the boards into a rough order before fixing anything, and lay them out on the ground to check the rhythm, alternating wide and narrow rather than randomly grabbing. The critical part is the frame: use new, properly treated posts and rails, and reserve the reclaimed timber for the cladding, since a beautiful old board on a rotten post is a fence that falls over in the first gale. Pull every old nail before you cut, or you will destroy a saw blade.
24. Use the Fence as a Backdrop, Not a Feature
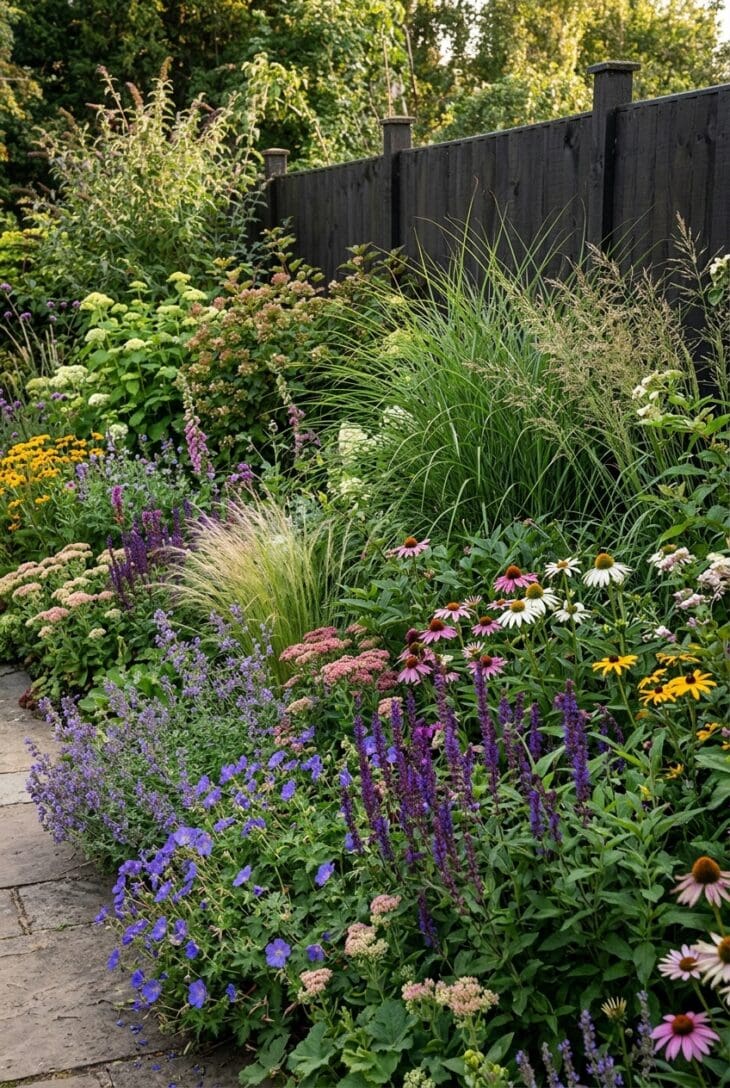
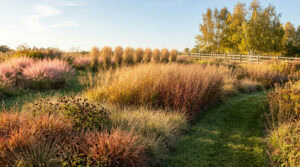
What you see A border so deep and so densely layered, with grasses and shrubs at the back and perennials in drifts at the front, that the fence behind it is only glimpsed in dark slivers. You could not describe the fence if you were asked to. That is the correct outcome.
Why it works The best boundary treatment is often not to treat the boundary at all but to stop the eye before it gets there. A 4ft (120cm) deep border with real height at the back does more for privacy and for looks than any amount of expensive carpentry, and it costs less. It also solves the problem that a beautiful fence creates, which is that a beautiful fence draws your eye straight to the edge of the plot and tells you exactly how small it is.
How to get it Give the border real depth, at least 4ft (120cm) and preferably 6ft (180cm), which usually means taking a bite out of the lawn, and the lawn will not miss it. Build in height at the back with a multi-stemmed tree, a big shrub or tall grasses such as Miscanthus sinensis ‘Malepartus’, so the eye stops at plants rather than timber. Paint the fence dark first, since a dark fence glimpsed between stems disappears while an orange one shouts. Plant in drifts of three or five rather than singles, and layer forward: tall at the back, mid-height in the middle, and something that flops at the front, which is exactly the structure behind the best garden border ideas.
25. Get the Posts Right, Because That Is What Fails
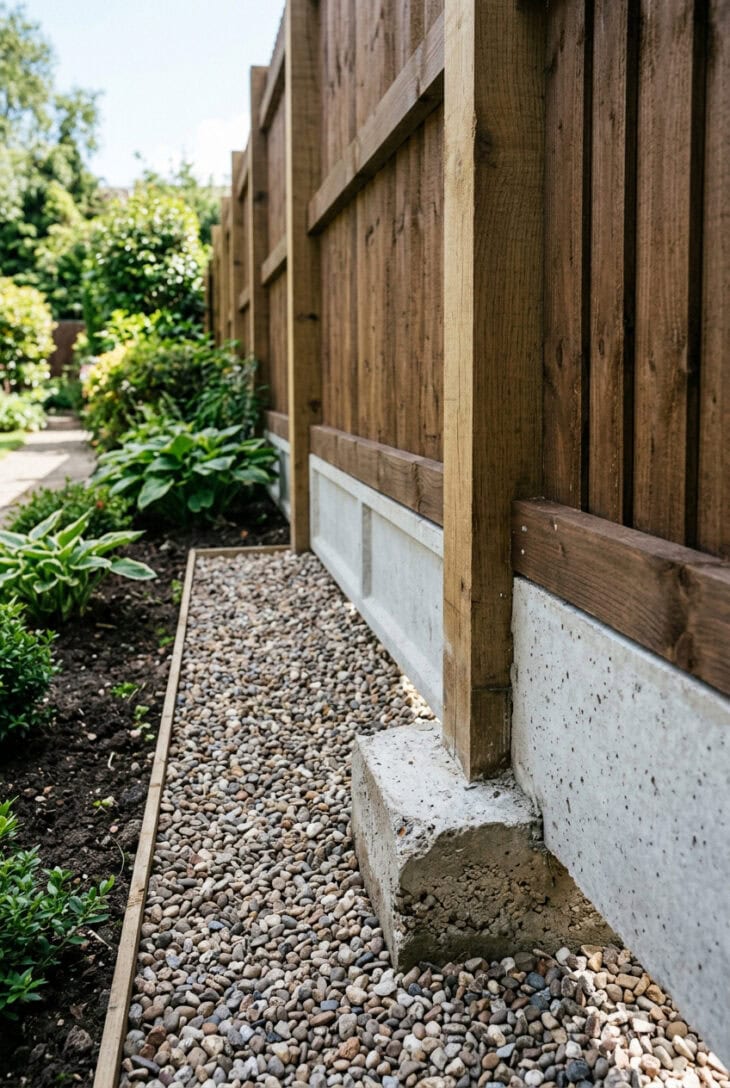
What you see The bottom foot of a fence, which is where every fence in the world dies. Here it has been done properly: a stout post set in a concrete collar that slopes away from the timber, a gravel board keeping the boards clear of the wet soil, and a strip of gravel along the base. Nothing beautiful, and the reason this fence will still be standing in twenty years.
Why it works Fences almost never fail in the middle of a panel. They fail at the post, right at ground level, where the timber is permanently wet and full of oxygen, which is exactly the condition rot needs. Everything else in this article, the paint, the climbers, the slats and the trellis, is sitting on those posts, so this is the one idea to get right before any of the others are worth doing.
How to get it Use posts rated for ground contact (a proper incised, high-pressure treatment) and set them 24in (60cm) into the ground for a 6ft (180cm) fence, which is a quarter of the total height. Either use concrete-in metal post spikes, or better, concrete the post in and finish the collar so it slopes away from the timber and sheds water, rather than forming a bowl that holds it against the post. Better still, use concrete posts and slot the panels in, which is not beautiful but is effectively permanent. Always fit a gravel board, timber or concrete, so no cladding touches the soil. And add a capping rail along the top, since the exposed end grain on the top of a board soaks up water like a straw and is the second place a fence rots.