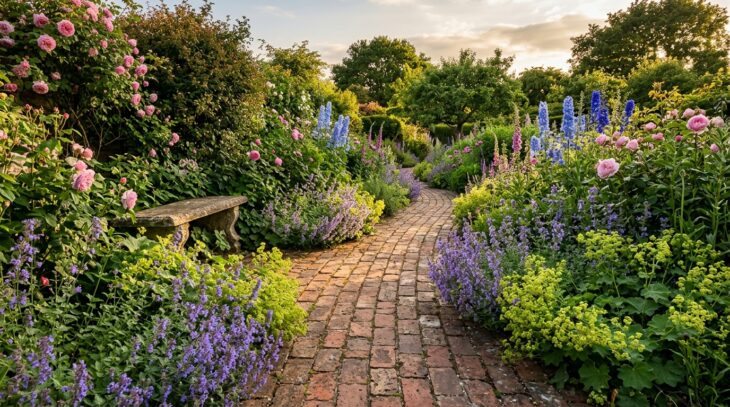
A path is the one thing in a garden that everybody uses and almost nobody plans. It gets laid where the concrete happened to end, or it does not exist at all and a muddy line through the grass shows where everyone walks anyway. Put a proper path in and the whole garden reads differently, because a path tells people where to go, how fast to walk, and what to look at on the way.
Contents
- 01. Classic Brick Herringbone Path
- 02. Stepping Stones Set Into Lawn
- 03. Pea Gravel Path With Steel Edging
- 04. Reclaimed Flagstone Path
- 05. A Bark Trail Through the Trees
- 06. Plant Creeping Thyme Between the Pavers
- 07. Curve It So the End Is Hidden
- 08. Let the Planting Spill Over the Edges
- 09. Log Slice Stepping Path
- 10. Cobble Sett Path
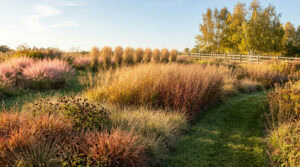
- 11. Mow a Path Through Long Grass
- 12. Timber Boardwalk Over Wet Ground
- 13. Big Slabs in a Sea of Gravel
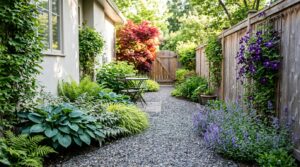
- 14. Rescue the Narrow Side Return
- 15. A Formal Axis With Clipped Box
- 16. Crushed Shell Path for a Coastal Garden
- 17. Concrete Planks With Gravel Joints
- 18. Stepping Stones Across Water
- 19. Walk Under a Rose Arch
- 20. Light It for the Evening
- 21. Break a Slope With Timber Steps
- 22. Set a Pebble Mosaic Into the Path
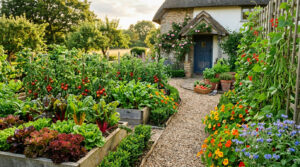
- 23. Working Paths Between the Vegetable Beds
- 24. A Fern and Hosta Walk in Deep Shade
- 25. Decomposed Granite for a Dry Climate
- 26. Run a Path Right Around the Lawn
- 27. Edge It Properly With a Brick Soldier Course
- 28. Narrow the Path to Stretch the View
- 29. Put the Path Where People Actually Walk
- 30. Make Sure It Works in Winter
The 30 ideas below cover every budget and every kind of plot. Some are a weekend with a bag of gravel and a rake, others are a proper brick laying job worth paying for. There are paths for shade, for slopes, for boggy ground, for a narrow passage down the side of the house, and for the big sweep through a border that you plan a whole garden around.
Read the ideas about width, curves and edging even if you already know your material, because those are the things that decide whether a path feels generous or mean. Then take whichever surface suits your soil, your climate and the amount of work you actually want to do.
01. Classic Brick Herringbone Path
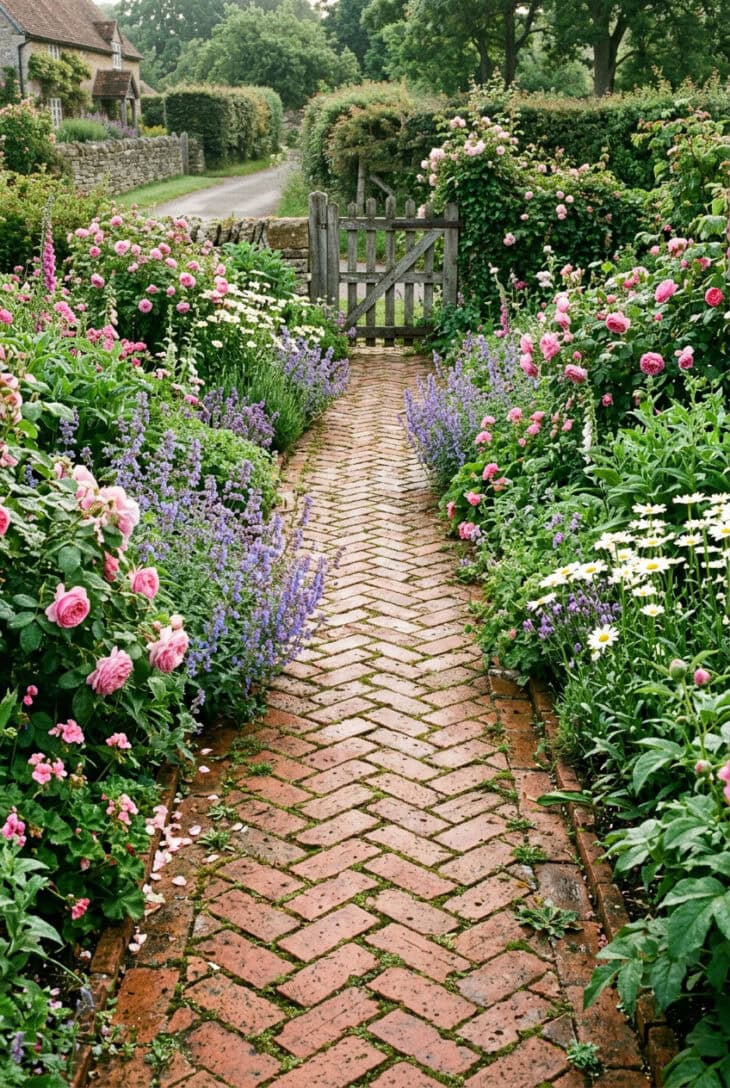
What you see A path of warm red clay brick, laid in a tight herringbone that zigzags away between two deep borders. The bricks are not perfectly flat and not perfectly matched, and there is moss in some of the joints, which is exactly why it looks as though it has been there for eighty years. Blue catmint and pink roses lean in from both sides and the whole thing glows in the morning light.
Why it works Herringbone is the strongest of all the brick patterns because every brick locks against its neighbours, so the path resists the sideways creep that pulls a stretcher-bond path apart over the years. It also has a visual bonus: the pattern points forward down the path and pulls the eye along it. And brick is small, which means it turns a curve and follows a slope without any cutting drama.
How to get it Use proper clay pavers or reclaimed stock brick, not concrete blocks and never soft interior bricks, which shatter after one hard freeze. Dig out 8in (20cm), lay 4in (10cm) of compacted hardcore, then 2in (5cm) of sharp sand, and bed the bricks on that. Run a 45-degree herringbone rather than a 90-degree one, because the cuts land against the edge where a soldier course will hide them. Finish with a brick edge on both sides, and brush kiln-dried sand into the joints, twice, a week apart. A 3ft (90cm) width lets two people walk side by side, which is the point of a main path.
02. Stepping Stones Set Into Lawn
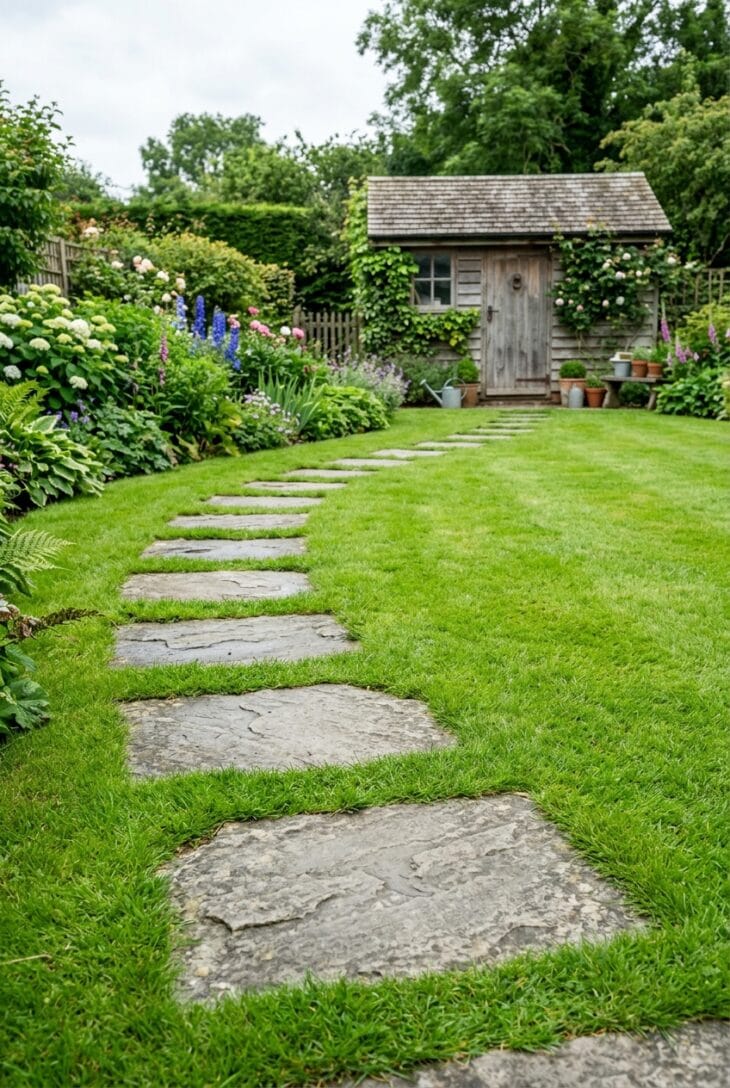
What you see Big flat slabs of grey stone dropped into a green lawn, one stride apart, curving off toward the shed. The grass runs right up to each slab and over the edge of it, so the stones look as though they were always there and the lawn simply grew around them. It is the quietest path in this list and probably the most used.
Why it works It solves the classic problem of the worn muddy line across the grass without giving up the lawn. Because the stones are set flush, the mower rides straight over them and there is no edging to trim, which makes this one of the genuinely low-maintenance garden ideas rather than one that just looks easy. And a stepping stone path stays visually soft: from the house you mostly see lawn, not a hard grey line cutting it in half.
How to get it Walk the route first and drop the stones where your feet actually land, rather than measuring: about 24in (60cm) centre to centre suits most people. Use slabs at least 18in (45cm) across, because anything smaller makes people aim, and thick ones (2in / 5cm plus) so they do not crack. Cut the turf around each stone with a spade, lift it, and bed the slab on 2in (5cm) of sharp sand so the top sits about 1/2in (1cm) below the grass. That gap is the whole trick: too proud and the mower blade hits it, too deep and the stone fills with water.
03. Pea Gravel Path With Steel Edging
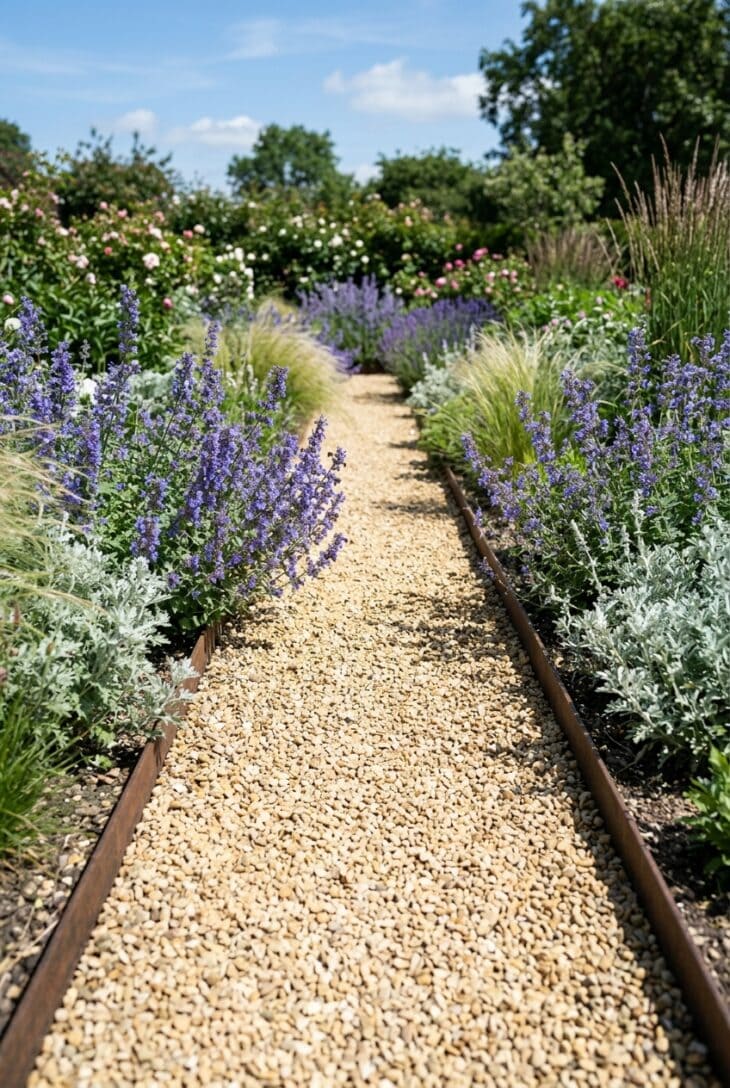
What you see A ribbon of pale honey gravel running dead straight between billowing planting, held on both sides by a thin line of rusted steel. The contrast is the point: loose, crunchy, informal gravel, contained by an edge so crisp it looks drawn. Catmint and silver artemisia flop over the steel and half hide it.
Why it works Gravel on its own always ends up in the borders. Steel edging is what turns it from a mess into a design, and because the steel is only about 1/8in (3mm) thick on show, it reads as a line rather than a kerb. Gravel is also the cheapest surface per square foot by a wide margin, it drains completely, and it crunches, which is a quietly effective burglar alarm.
How to get it Ask for 10mm (3/8in) angular gravel, not rounded pea shingle, because angular chippings knit together and stop your heels sinking. Excavate 4in (10cm), lay a permeable membrane, put down 2in (5cm) of compacted MOT hardcore, then only 1 1/2in (4cm) of gravel on top. Deep gravel is the single most common mistake and it walks like dry sand. Corten or galvanised steel edging pinned every 3ft (90cm) will hold it, and it works beautifully alongside the planting palette in a gravel garden. Top the gravel up every three or four years.
04. Reclaimed Flagstone Path
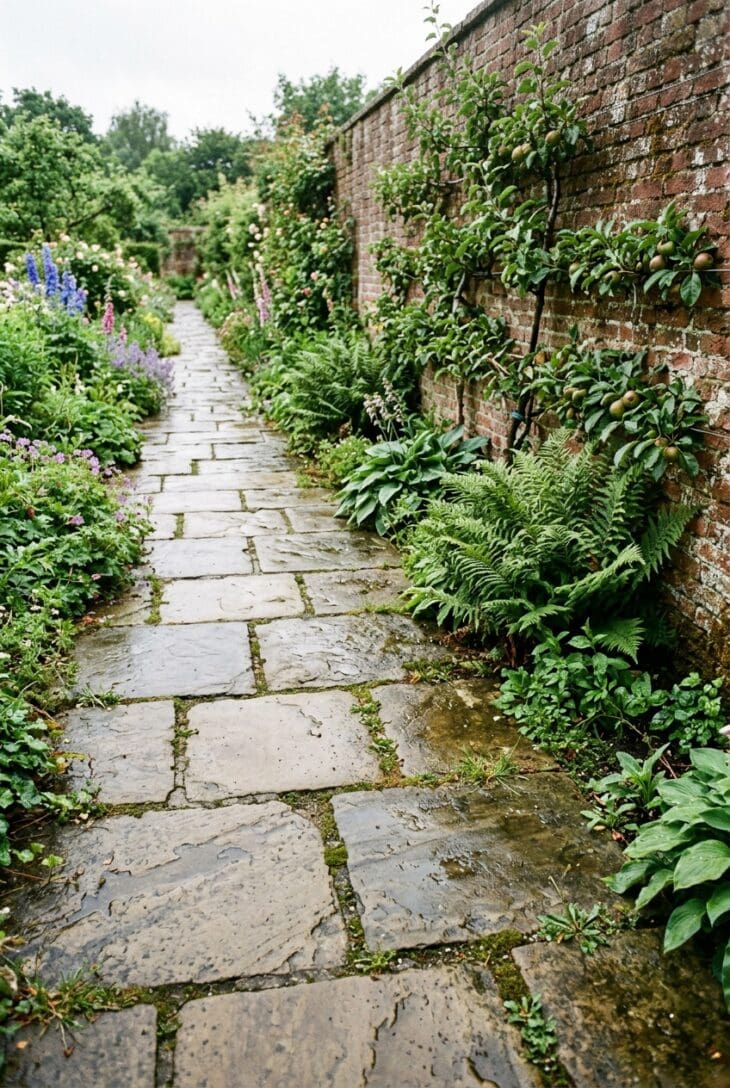
What you see Big irregular slabs of old riven stone, buff and grey, worn hollow in the middle where a century of feet have crossed them. The joints are wide and weathered and a few small plants have seeded into them. It runs along the foot of an old brick wall, and it looks less like a path than like part of the ground.
Why it works Nothing else gives a new garden instant age. Reclaimed stone arrives already weathered, in mismatched sizes, with the colour variation that a machine-made slab spends twenty years failing to develop. Laying the slabs in random sizes rather than a grid is what keeps it from looking like a patio that wandered off, and the wide, soft joints tie the stone visually into the planting on either side.
How to get it Buy from a reclamation yard and expect a mix of thicknesses, which means bedding each slab individually on a full mortar bed rather than on sand, or it will rock. Lay the biggest slabs first and fill between them with smaller ones, avoiding any joint that runs straight across the path. Keep joints under 1in (25mm) and point them with a dry sand and cement mix brushed in, or leave them open and plant them. Riven stone gets slippery in shade, so scrub it with a stiff brush each spring rather than waiting for green algae to build.
05. A Bark Trail Through the Trees
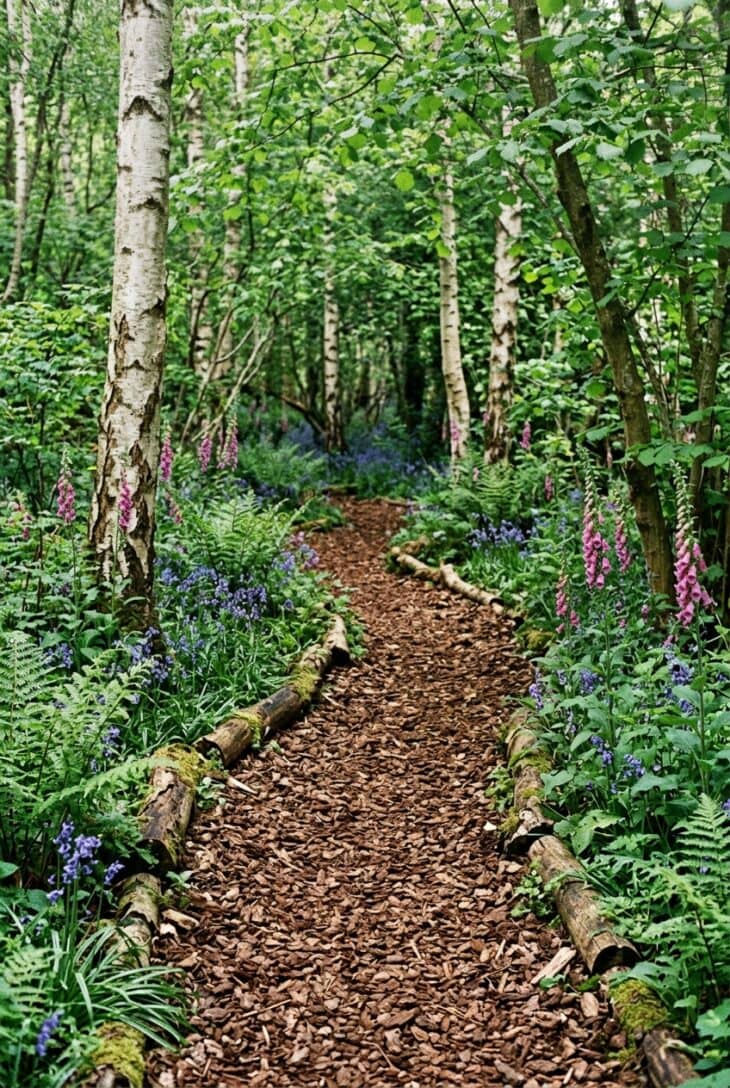
What you see A soft brown trail of chunky bark winding between birch trunks, loosely edged with logs, with ferns and foxgloves crowding in from both sides. The light is green and dappled and the path is silent underfoot. It feels like something you found rather than something you built.
Why it works Bark is the cheapest path surface there is, it needs no foundation, and it is the only one that is genuinely kind to tree roots, because you are adding material on top rather than digging a trench through the root plate. It is also the correct texture for the setting: a hard path through a woodland corner always looks imposed, while bark simply reads as forest floor. Use it wherever the garden goes shady and informal.
How to get it Use chunky composted bark or wood chip, at least 2in (5cm) nuggets, because fine bark turns to mush and blows away. Strip the turf, lay a permeable membrane to stop the bark sinking into the soil, then spread 3in (8cm) and top it up annually, since it rots down by roughly an inch a year. Edge it with logs, hazel hurdles or nothing at all. Skip it on any slope steeper than about 1 in 12, since bark washes downhill in heavy rain. Foxglove (Digitalis purpurea) and ferns either side will finish the picture, and the same plants carry the deeper shade garden ideas further into the plot.
06. Plant Creeping Thyme Between the Pavers
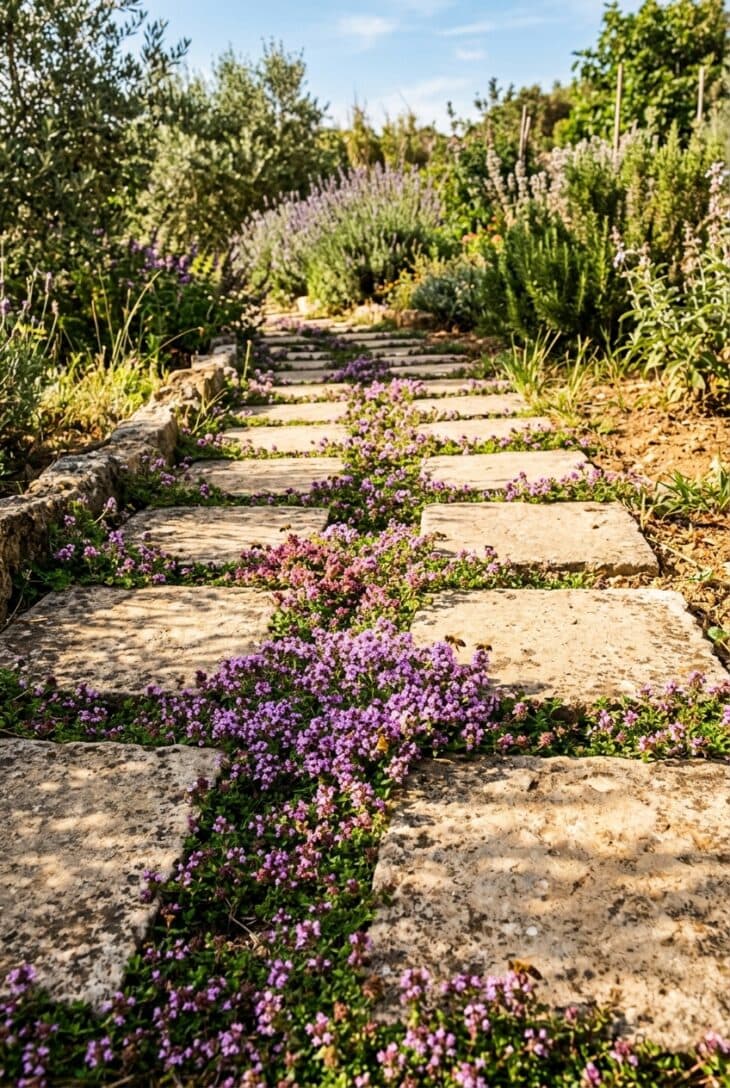
What you see Square stone pavers with deliberately wide gaps, and every gap packed with flowering creeping thyme in purple and dusty pink, spilling over onto the stone. Bees are working it. Step on it and the whole path smells of herbs.
Why it works The joint is the softening. A paved path with thin sand joints is hard and grey, and the same path with 3in (8cm) planted joints is a garden feature that flowers, feeds bees and releases scent when you walk on it. Thyme (Thymus serpyllum) is the right plant because it is the rare thing that genuinely tolerates being trodden on, and it stays under 2in (5cm), so it never trips anyone. It is a small change that puts real value into pollinator planting in a space that was doing nothing.
How to get it Set the pavers on a free-draining base with 2 to 3in (5 to 8cm) joints and fill the joints with a gritty, low-nutrient mix, roughly half sharp sand and half topsoil, never rich compost. Plant small plugs of creeping thyme (Thymus serpyllum ‘Elfin’) or Corsican mint (Mentha requienii) for damper shade, one plug per gap, in spring. Water them through the first summer and keep off the path for six weeks while they root. It needs full sun and sharp drainage, so if your path is shaded and wet, plant Irish moss (Sagina subulata) instead, or accept moss and enjoy it. Trim back with shears once a year after flowering.
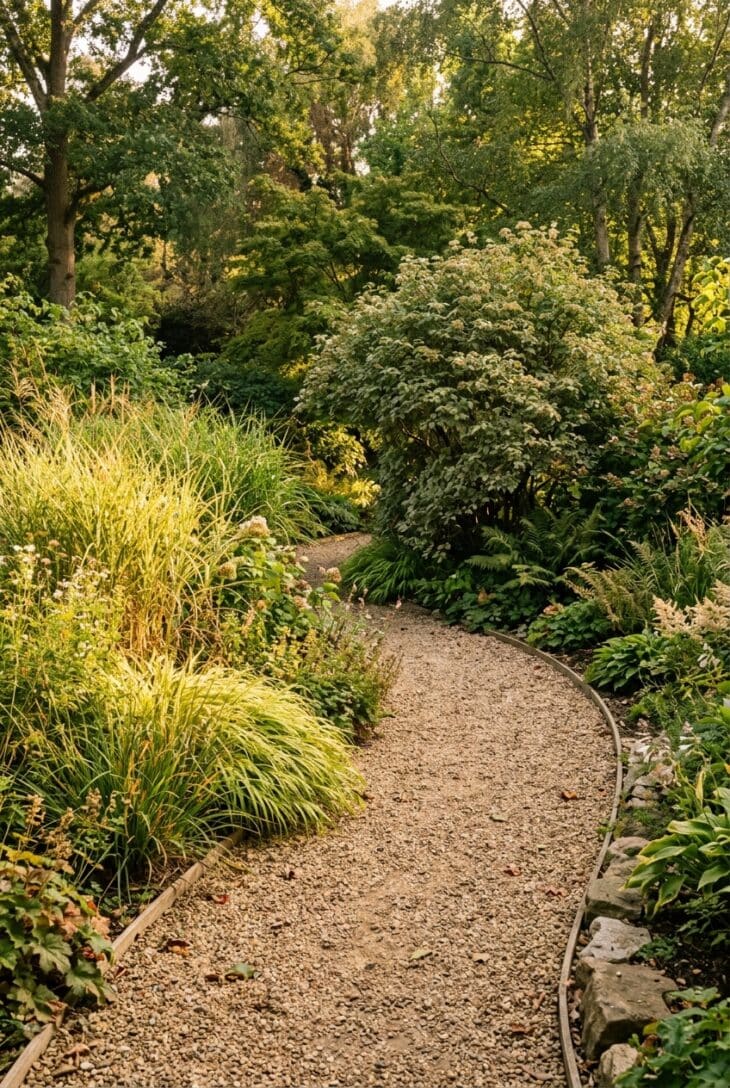
What you see A path that swings gently to the left and vanishes behind a big shrub. You cannot see where it goes. Grasses and shrubs mass on the inside of the bend so that the view forward closes off completely, and the only way to find out what is round the corner is to walk it.
Why it works A path you can see the end of is a corridor. A path that disappears is a question, and people will answer it with their feet. This is the cheapest trick in garden design and it works in a plot of any size, because concealing the destination makes the garden feel bigger than it measures: the brain assumes there is more behind the shrub than there is.
How to get it The curve has to have a reason, or it reads as a wiggle for its own sake. Put something solid on the inside of the bend and curve around it: a multi-stemmed tree, a big grass, a group of three shrubs. Keep the radius generous, because a tight S-bend is uncomfortable to walk and people will cut the corner and wear a line through your planting. One good curve beats three small ones. And place the concealing shrub so that the view opens only when you are actually into the bend, which is what makes the reveal land.
08. Let the Planting Spill Over the Edges
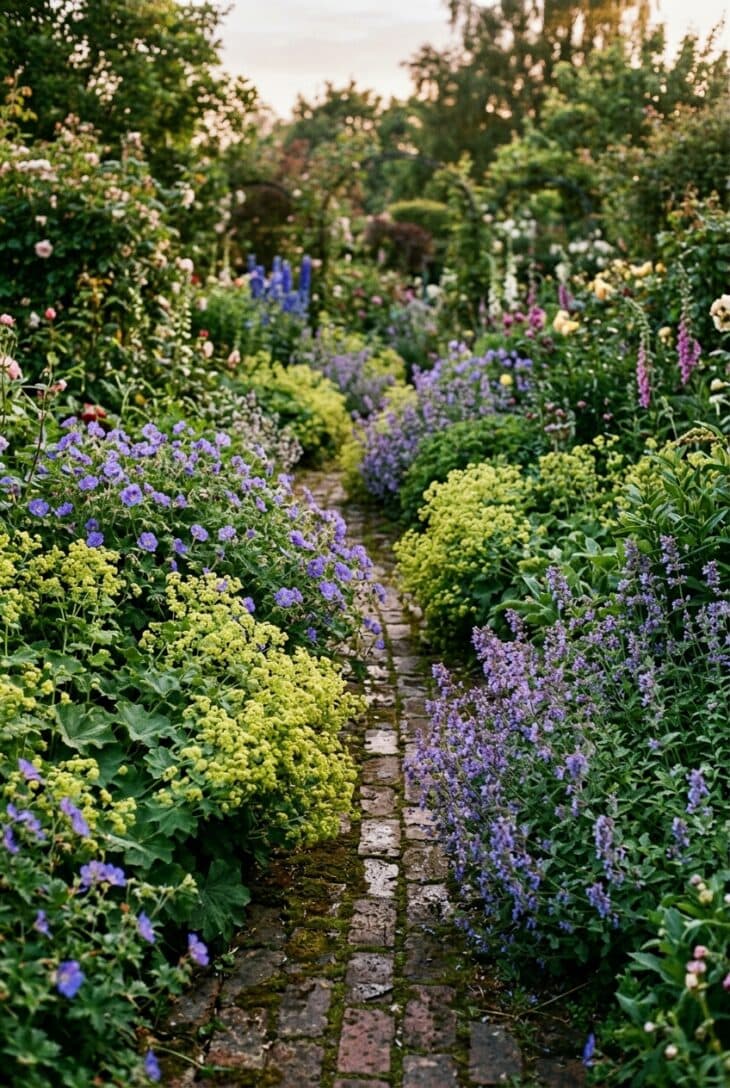
What you see A brick path so overgrown you can barely see it. Lady’s mantle, hardy geraniums and catmint have flopped right over the edges from both sides, leaving a winding strip of brick down the middle that is just wide enough to walk. Everything is soft, nothing is clipped, and it looks like the most relaxed place in the garden.
Why it works A hard edge between path and border is what makes a garden look municipal. Letting the planting break that line does two things: it hides the join, and it forces you to slow down and walk single file, which is exactly the pace you want in a cottage garden. The path is still doing its job, it has simply stopped announcing itself.
How to get it Build the path wider than you need, at least 4ft (120cm), because you are about to lose a foot off each side to the planting. Use floppy edge plants that shrug off being brushed past: lady’s mantle (Alchemilla mollis), catmint (Nepeta x faassenii ‘Six Hills Giant’), hardy geranium (Geranium ‘Rozanne’) and lavender (Lavandula angustifolia ‘Hidcote’) in sun. Plant them 12in (30cm) back from the edge, not on it, and let them travel. Cut catmint and lady’s mantle hard back after their first flush and they will regrow fresh and flower again. Hard paving copes with this; loose gravel does not, since the plants trap leaves and the gravel migrates.
09. Log Slice Stepping Path
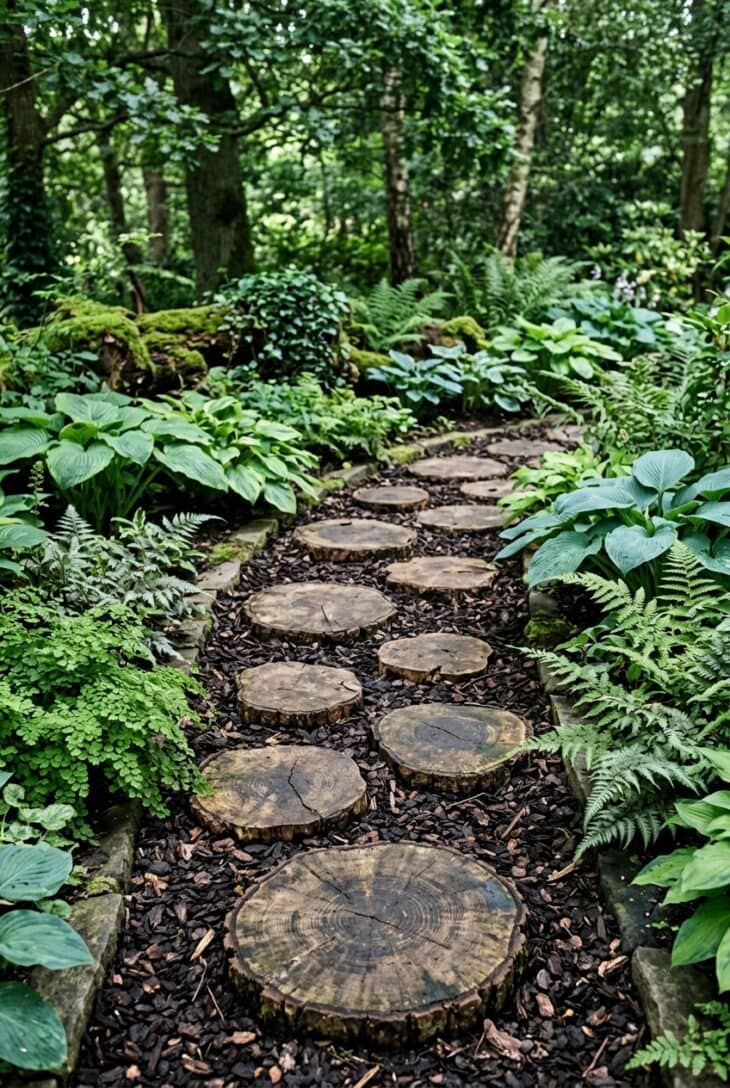
What you see Fat round slices of tree trunk, growth rings and bark still on them, sunk flush into a bed of dark bark chip. They step through a shady corner between ferns and hostas, warm honey-coloured discs against all that brown and green. Children treat it as a game without being told to.
Why it works It costs almost nothing if a tree has come down near you, and it puts a natural, tactile material into a part of the garden where stone would feel wrong. The contrast of pale cut wood against dark bark mulch is what makes it read as a path rather than a woodpile. It also decays, which sounds like a fault and is actually a feature: rotting wood feeds beetles, fungi and the birds that eat them.
How to get it Cut slices 3 to 4in (8 to 10cm) thick from a durable hardwood such as oak, sweet chestnut or robinia; softwoods and birch rot within two or three years. Sink each slice into the bark bed so the top is flush and it cannot rock. Accept that they will get slippery when wet, because end-grain wood always does, so staple a strip of chicken wire across the top of each one, which grips underfoot and disappears from view within a season. Expect to replace slices every five to eight years, and enjoy the ones that go soft and mossy in the meantime, since that is good wildlife garden habitat.
10. Cobble Sett Path
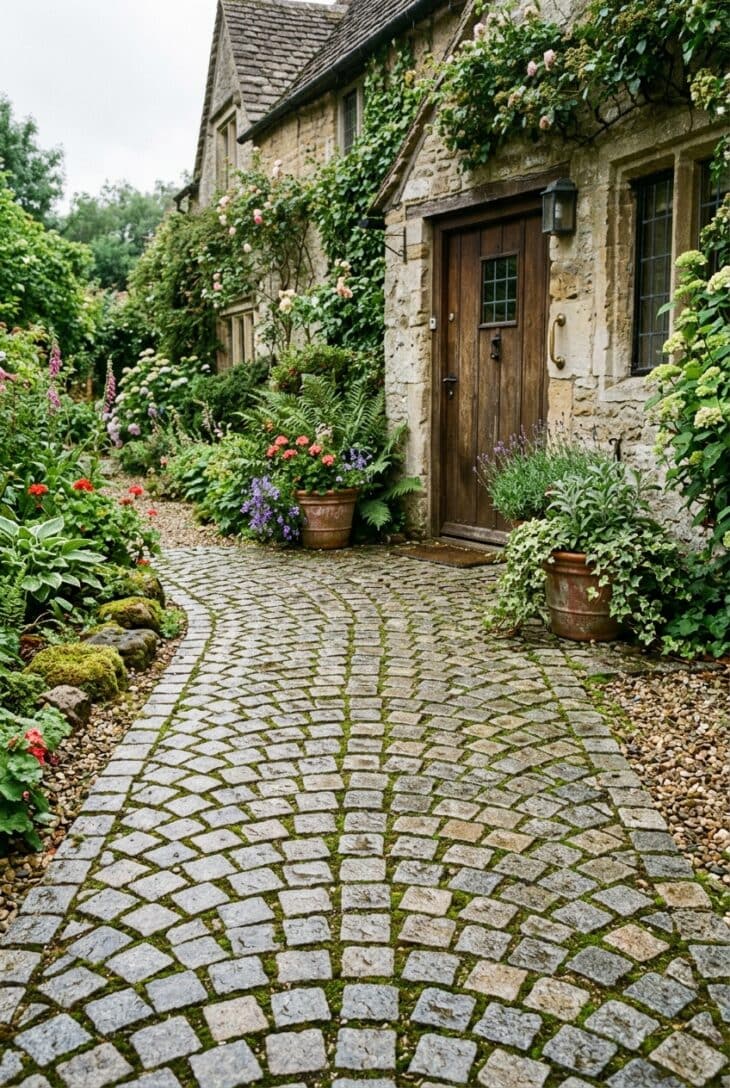
What you see Hundreds of small grey granite setts laid in tight fanning arcs, damp from rain and catching the light, running up to a cottage door. The path is very slightly domed in the middle so the water runs off it. Moss has taken the joints at the edges and the whole surface has the texture of an old street.
Why it works Setts are the most durable path surface you can lay and effectively immortal, which is why the ones outside old buildings have outlived the buildings. Because each unit is tiny, a sett path takes any curve, any slope and any awkward shape without a single cut, and the fan pattern turns that into a virtue. The scale is right for a front path, where a big-slab surface would look coarse.
How to get it This is the most labour-intensive path here and the one to be honest with yourself about: a fan-laid sett path is a skilled job, and 100 square feet (9 sq m) is a long weekend even for a professional. Use granite or reclaimed stone setts, roughly 4in (10cm) cubes. Bed them on a semi-dry mortar mix over compacted hardcore, tap each one to level with a rubber mallet, and keep joints tight at about 1/2in (12mm). Point with mortar rather than sand for a front path so weeds cannot colonise the joints, and fall the surface 1 in 60 to one side, or crown it, so it drains. It is the right choice for a short path that will be walked ten thousand times, such as the run from the gate to the door in a front garden.
11. Mow a Path Through Long Grass
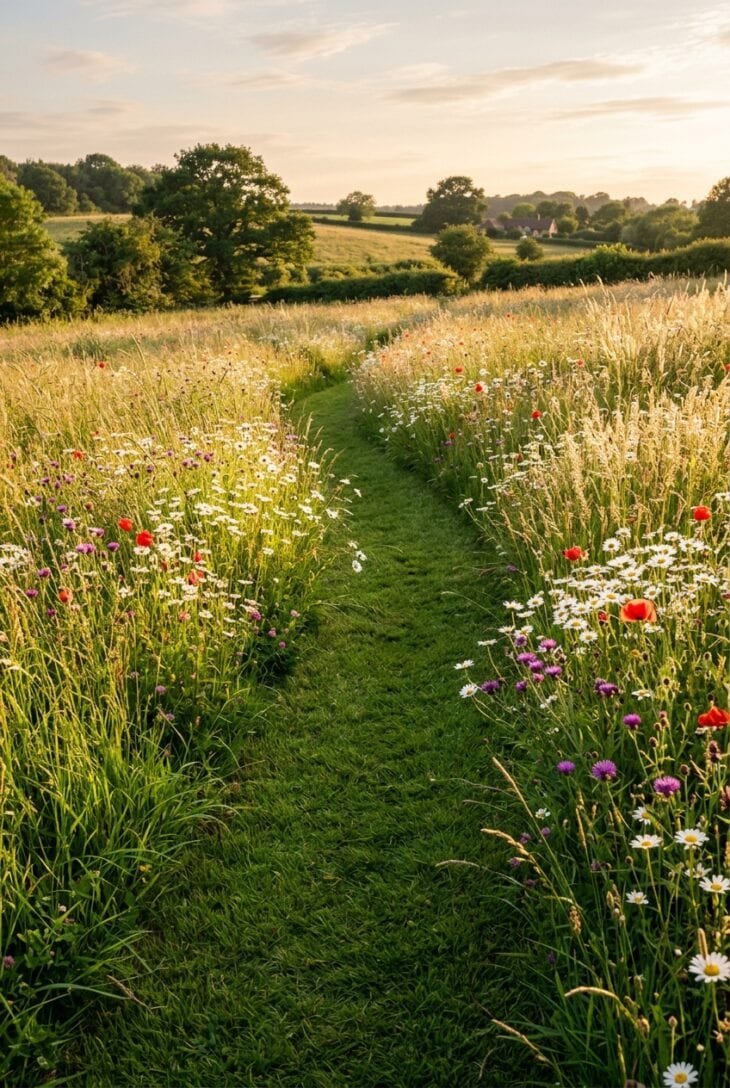
What you see A crisp green corridor of mown grass, curving away through a meadow that has been left to grow waist high. Ox-eye daisies, poppies and knapweed lean in over the cut edge, backlit and full of insects. The path is the only tidy thing in sight, and it is what makes the rest look intentional rather than neglected.
Why it works This is the highest-value, lowest-cost idea in the article. It costs one pass with a mower and it does the essential job of a meadow: it signals to every visitor, and every neighbour, that the long grass is a deliberate decision. A mown path also gives you a way into the meadow to look at it closely, which is where the pleasure of one actually lives.
How to get it Mow the path first, in early spring, and only then stop mowing everything else, so the shape is set before the grass gets away. Make it wider than feels necessary, at least 3ft (90cm), because a narrow path through tall wet grass soaks your legs. Cut it weekly at normal lawn height right through the season so the contrast in height stays sharp, since a slightly-shorter path through slightly-long grass just reads as a bad lawn. Curve it, give it somewhere to go (a bench, a tree, a gate), and cut the meadow itself once in late summer, removing the clippings.
12. Timber Boardwalk Over Wet Ground
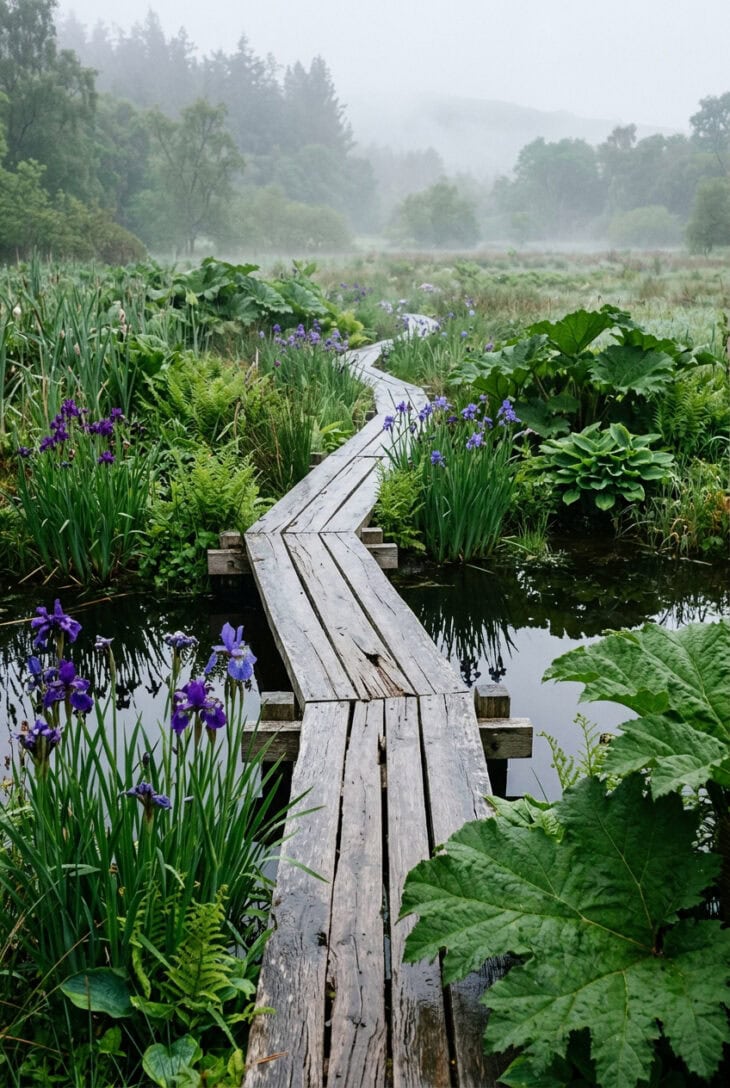
What you see A low boardwalk of silvered timber planks, lifted a few inches above wet ground, running straight through a stand of irises, rushes and big damp-loving leaves. Dark water shows between the plants on either side. It is a path you can hear: hollow underfoot, which changes how the whole crossing feels.
Why it works Wet ground is usually treated as a problem to be drained, which is expensive, often futile, and throws away the most interesting habitat in the garden. A boardwalk sidesteps it entirely: you keep the bog, the frogs and the irises, and you get dry feet. Raising the walker above the planting rather than cutting a trench through it also gives a completely different view, looking down into the vegetation.
How to get it Set pressure-treated bearers on concrete pads or driven timber posts so the deck floats 4 to 6in (10 to 15cm) clear of the wet, and use a durable timber (oak, larch, or treated softwood rated for ground contact). Run the deck boards across the walking direction, with a 1/4in (6mm) gap between them for drainage, and leave the timber to weather to silver rather than staining it. Wet timber is slippery timber, so either use grooved anti-slip boards or staple fine galvanised mesh over the surface. Keep it low and simple: at 6in (15cm) high nobody needs a handrail, and a handrail is what makes it look like a municipal nature reserve.
13. Big Slabs in a Sea of Gravel
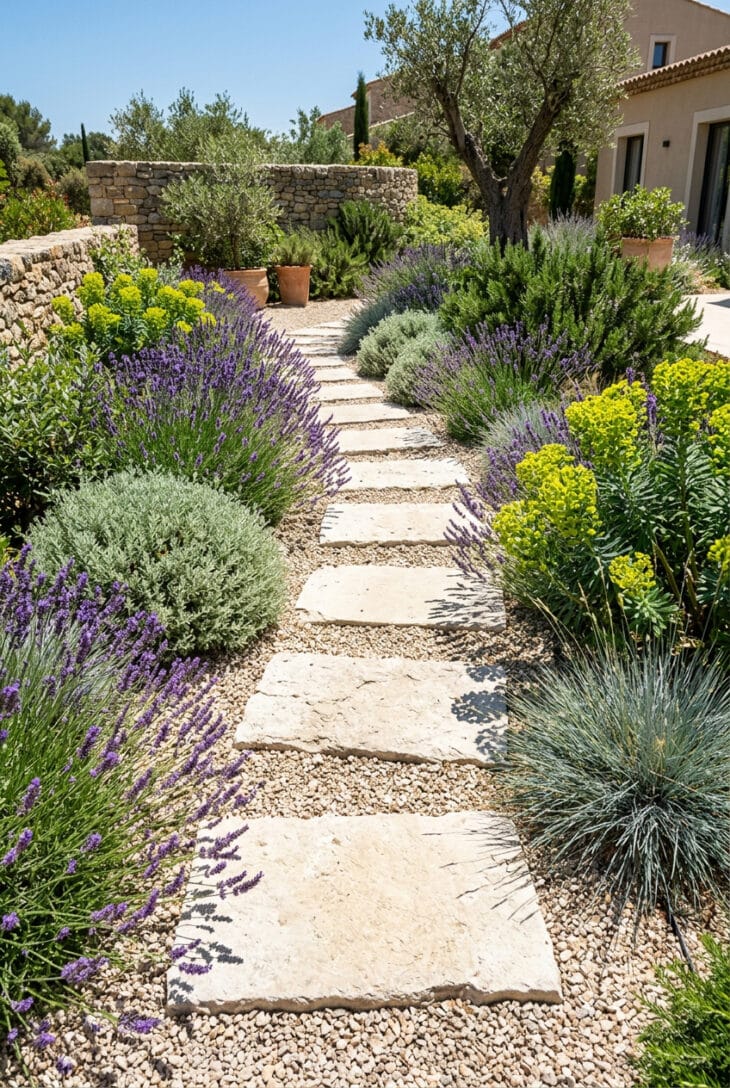
What you see Big pale limestone slabs, set at generous intervals into a sea of gravel the same colour, so the path and the ground it crosses are made of the same stone in two different sizes. Lavender, santolina and blue fescue come right up to the edges. It is dry, bright and confident, and it uses half the stone a paved path would.
Why it works The slabs give you a firm, level, wheelbarrow-friendly surface where your feet actually go, and the gravel does everything else for a fraction of the price. Matching the two materials by colour is the move that makes it look designed rather than economical. It suits the dry, sun-baked palette of Mediterranean garden ideas perfectly, and it drains so freely that the plants either side actively prefer it.
How to get it Use slabs of a decent size, at least 24 x 36in (60 x 90cm), because small slabs floating in gravel look like stepping stones that lost their nerve. Bed each one on mortar or a well-compacted sub-base so it does not sink or rock, with the top flush with the gravel. Space them so a natural stride lands centrally, roughly a 6 to 8in (15 to 20cm) gravel gap between slabs for a walking rhythm, or a wider gap for a slow, deliberate one. Choose a gravel within a shade or two of the stone and keep it shallow, 1 1/2in (4cm), over a compacted base.
14. Rescue the Narrow Side Return
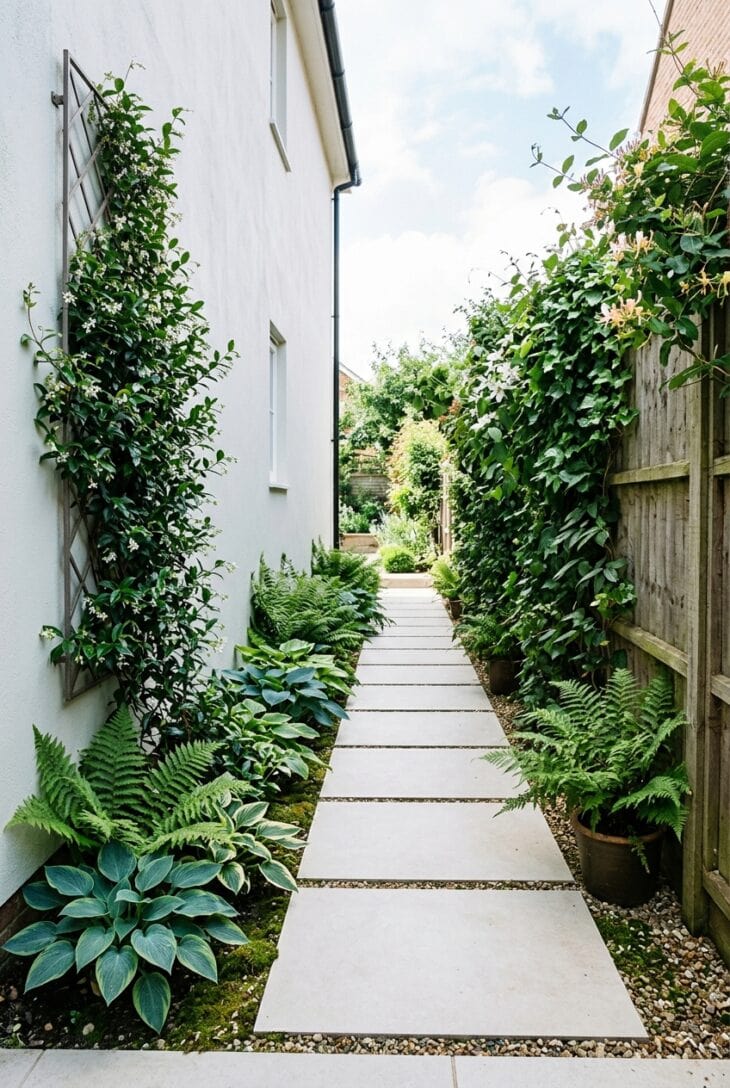
What you see The strip down the side of the house, the one that usually holds the bins and a dead mop. Here it has a clean path of pale pavers down the middle, a slim green ribbon of ferns and hostas at the foot of the wall, and climbers going up the fence. The pale wall bounces light down into it and it feels like a corridor in a garden rather than a gap between two buildings.
Why it works The side return is dark, narrow and usually wasted, and it is also the route everyone takes to get to the back garden, so it is the first impression of the whole plot. Because it is so narrow, a little effort goes a long way here: pale paving and a pale wall together can double the perceived light, and a 12in (30cm) planted strip is enough to make it read as green. This is the highest-return square footage in most small gardens.
How to get it Keep at least 30in (75cm) clear for walking, which is enough to get a wheelbarrow or a bike through. Choose a pale, non-slip surface (porcelain or light concrete pavers) because this passage never dries out and dark slabs will go green. Fall the paving away from the house wall so water runs off, never toward it, and keep the finished level at least 6in (15cm) below the damp course. Plant the shady strip with ferns, hostas and coral bells (Heuchera), and run climbing hydrangea (Hydrangea anomala subsp. petiolaris) or star jasmine (Trachelospermum jasminoides) up the fence to green the vertical, since in a passage this narrow the walls are most of what you see.
15. A Formal Axis With Clipped Box
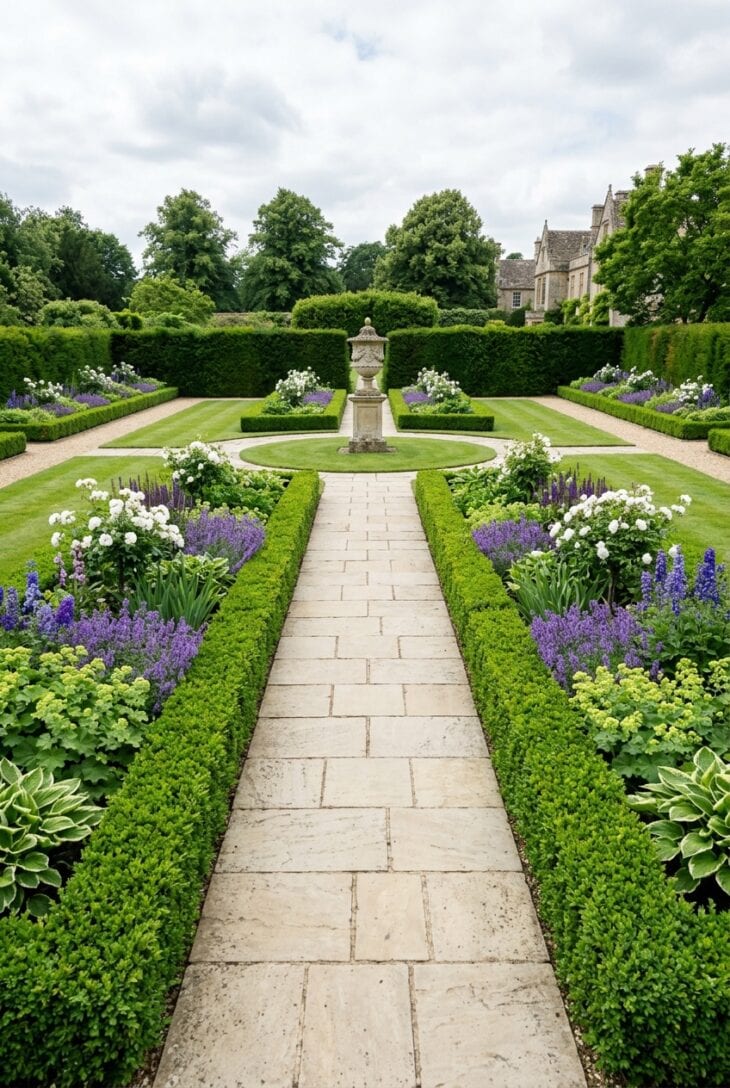
What you see A dead straight path of pale stone flags running down the spine of the garden, with low clipped box on both sides and identical planting mirrored left and right. At the far end, framed exactly, sits a stone urn on a plinth. Nothing is accidental and that is entirely the point.
Why it works A straight path only works if it is going somewhere, and the urn is what gives it permission. Formality also does something useful in a plain rectangular plot: it takes the shape you were stuck with and turns it into the design instead of fighting it. The clipped green line holds the whole thing together in winter when the planting is gone, which is why box has been used for this for four hundred years.
How to get it Set the axis on something real: the centre of the back door, a window, or the middle of the far boundary, and be ruthless about getting it square. Use box (Buxus sempervirens ‘Suffruticosa’) clipped to 12 to 16in (30 to 40cm), planted 5 to a yard (metre), or substitute Japanese holly (Ilex crenata) if box blight is a problem in your area. Clip once in early summer and again lightly in late summer, on a dry, dull day. The focal point matters more than the hedge: an urn, a bench, a clipped yew (Taxus baccata) or a gate, but something. A straight path ending in a fence panel is just a corridor.
16. Crushed Shell Path for a Coastal Garden
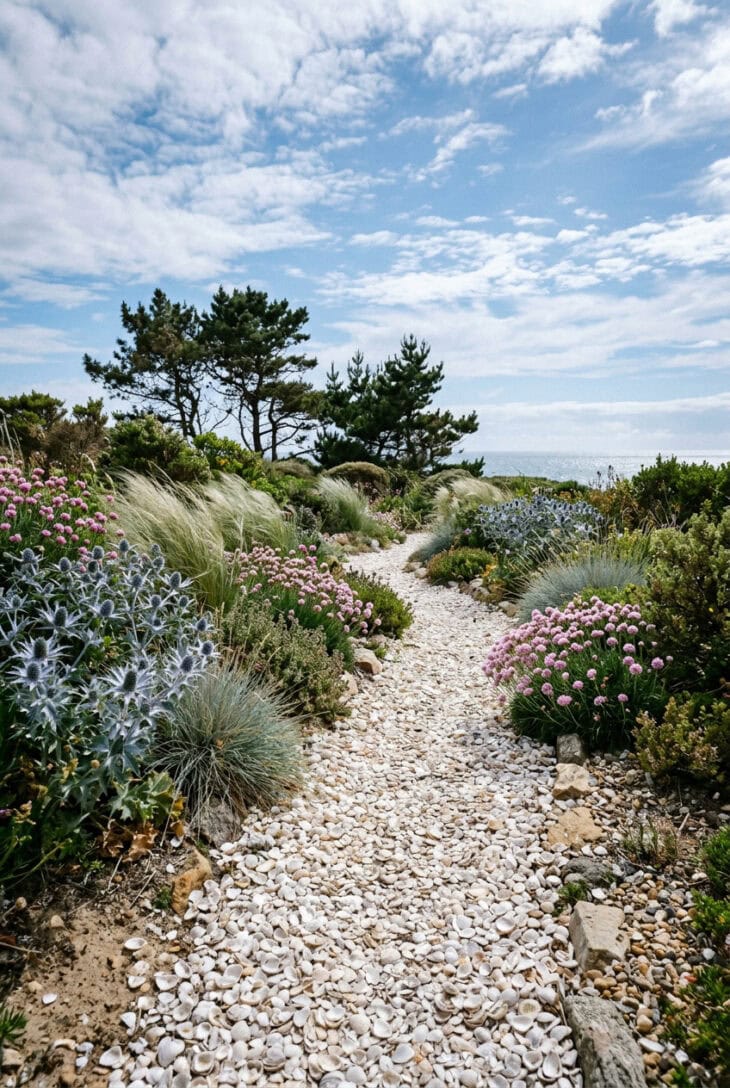
What you see A path of crushed white shell, so bright it almost glares, winding between sea holly, silver grasses and low mounds of thrift. It crunches loudly underfoot and it throws light up into the planting from below. The whole thing smells faintly of the sea even when the sea is miles away.
Why it works Colour is doing the heavy lifting: a bright white path in a garden of blue-grey and silver planting is a deliberate high-contrast palette, and it is unmistakably coastal without a single anchor or piece of driftwood in sight. Shell is also functional in these conditions, since it drains instantly and does not blow away like fine grit. It slowly breaks down and raises the pH, which the plants used in coastal gardens tend to enjoy.
How to get it Buy crushed cockle or oyster shell by the bulk bag from an aggregate supplier rather than a garden centre, where it is sold in handfuls at absurd prices. Lay it exactly like gravel: membrane, 2in (5cm) of compacted sub-base, then 1 1/2in (4cm) of shell, held with a firm edge (timber or steel), because shell migrates. It is sharp, so it is a poor choice where children play barefoot or dogs run. Expect it to dull from white to cream within a couple of years as it weathers, which honestly looks better.
17. Concrete Planks With Gravel Joints
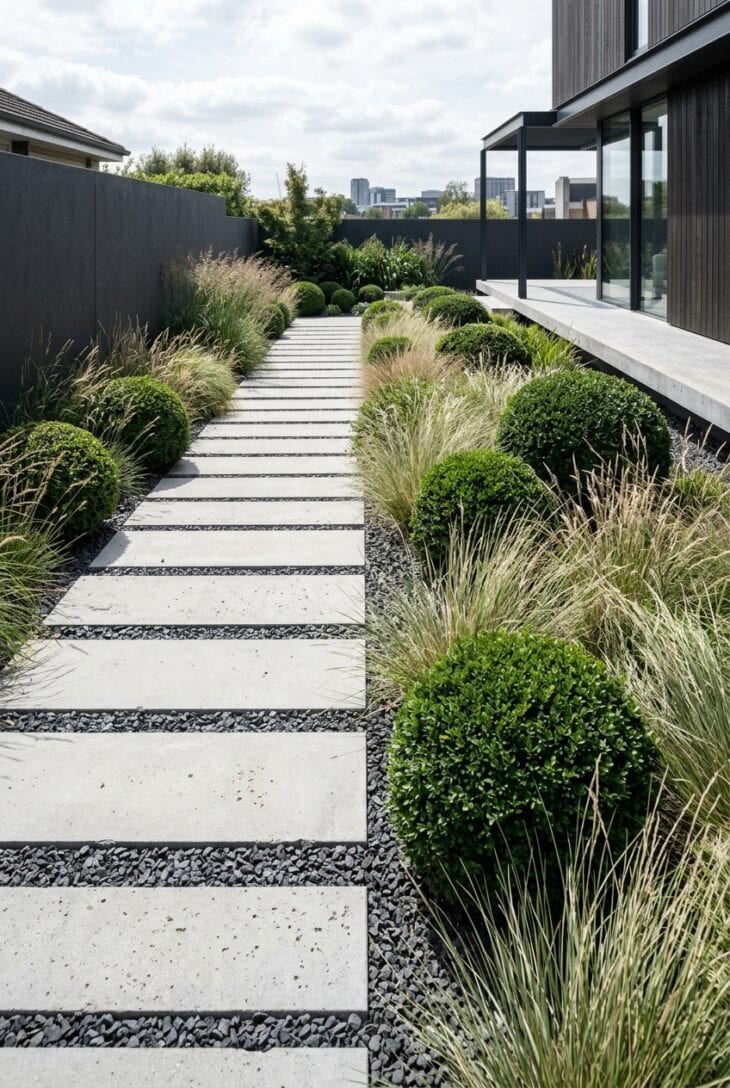
What you see Long pale concrete planks laid one after another, each separated by an even band of dark gravel. The rhythm of light plank, dark line, light plank runs away from you like a ladder. Around it, grasses and clipped evergreen domes, nothing fussy. The garden equivalent of a well-cut coat.
Why it works The repeated joint is the design. Contemporary paving lives or dies on the accuracy of its lines, and by making the joint wide and dark instead of trying to hide it, you turn the one thing that is hard to get perfect into a deliberate stripe. The strong horizontal banding also shortens the apparent length of a long thin garden, which is a useful thing to know. This is the paving language of most modern garden ideas.
How to get it Buy planks in a single size, typically 8 x 36in (20 x 90cm) or similar, from one batch, since colour varies between batches and it will show. Lay them on a full mortar bed with a string line, and use spacers to keep every joint identical, because the eye will forgive an off-level slab far sooner than an inconsistent gap. A joint of 1 1/2 to 2in (4 to 5cm) filled with dark 6mm chippings gives the contrast; anything narrower just looks like a bad joint. Keep the planting simple and repeated: three or five plants used many times, not twenty used once.
18. Stepping Stones Across Water
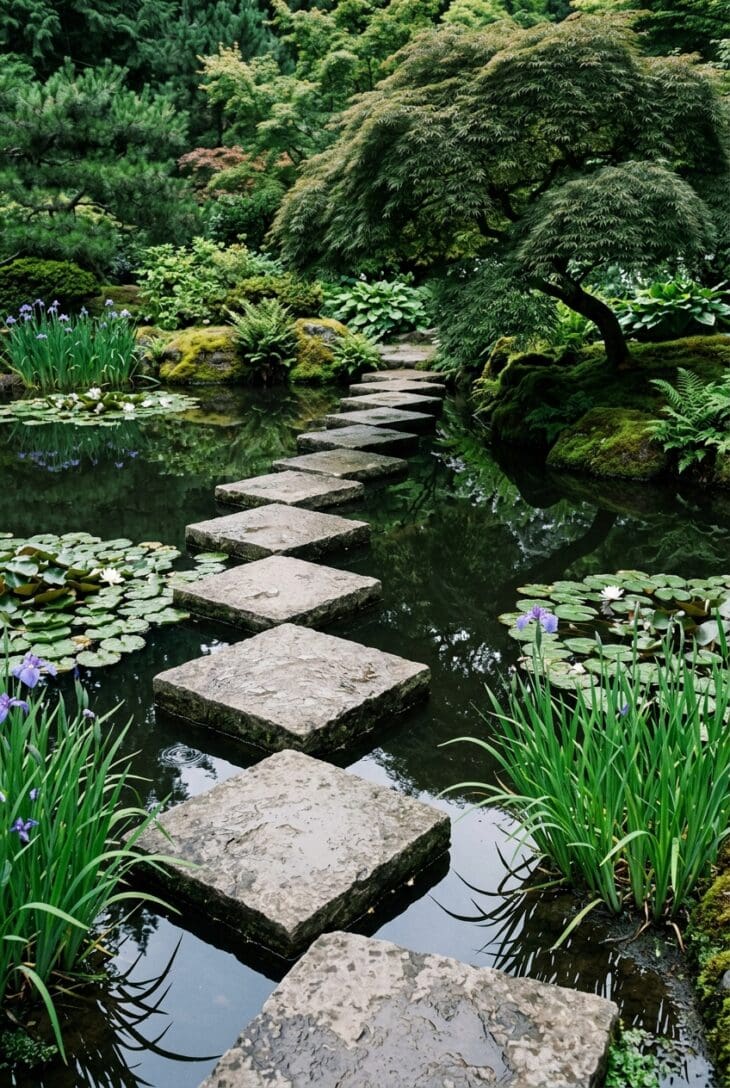
What you see Flat square slabs sitting just above the surface of a dark, still pool, crossing it in a staggered line so that you have to change your step. A Japanese maple (Acer palmatum) leans over the water and doubles itself in the reflection. Lilies float at the edges. Crossing it takes ten seconds and you remember it for years.
Why it works A path across water is the strongest experience a small garden can offer, because it makes you concentrate. That is the actual mechanism behind the staggered stones in the Japanese garden tradition: an irregular rhythm forces you to look down and slow to a stop, and a stop is where the view happens. It is also the only path where the surface below is doing more visual work than the path itself.
How to get it Build the piers first: concrete blocks or a poured pad on the pool base, sized so the slab sits 2 to 3in (5 to 8cm) proud of the water. Use heavy slabs, at least 24in (60cm) square and 2in (5cm) thick, and bed each one on mortar so there is not the smallest rock in it. Stagger the line left and right rather than running it straight, and vary the gaps slightly. Take the safety seriously: they will be wet, algae grows fast in still water, so brush them off every spring, and think hard before building one where small children play unsupervised. Keep the water clear and the planting sparse, since this idea depends on restraint.
19. Walk Under a Rose Arch
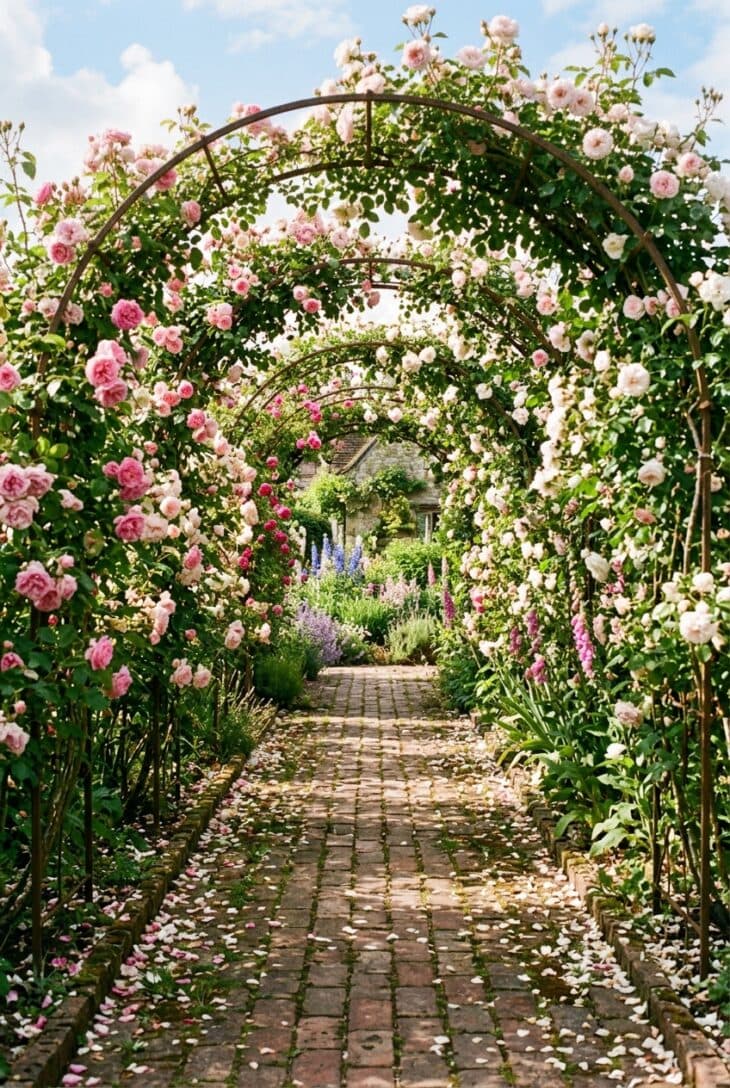
What you see A run of metal arches over a brick path, buried under pink and white climbing roses, making a tunnel you walk through with flowers overhead and petals on the ground. At the far end, a bright square of open garden. In June it is the best thirty feet in the garden and it smells extraordinary.
Why it works Everything so far has been about the ground. An arch works on the third dimension, and enclosing a path overhead does something no amount of planting at ankle height can: it compresses the space, then releases it when you come out the other side. That squeeze and release is why the garden beyond looks bigger and brighter than it is.
How to get it Buy arches taller than you think you need, at least 7ft (215cm) to the underside, because the roses will hang down 12in (30cm) and you will be ducking for the next twenty years. Space them 5 to 6ft (150 to 180cm) apart so they read as a tunnel rather than as separate hoops, and use galvanised steel; cheap coated tube rusts through at the ground line in five years. Plant a repeat-flowering climber rather than a once-blooming rambler if the arch is near the house: rose ‘Gertrude Jekyll’ or ‘The Generous Gardener’, one plant per leg. Train the main stems around the leg in a spiral rather than straight up, because bending a stem toward the horizontal is what makes it flower along its whole length instead of only at the top. Wisteria (Wisteria sinensis) and clematis both do the same job if roses are not your thing.
20. Light It for the Evening
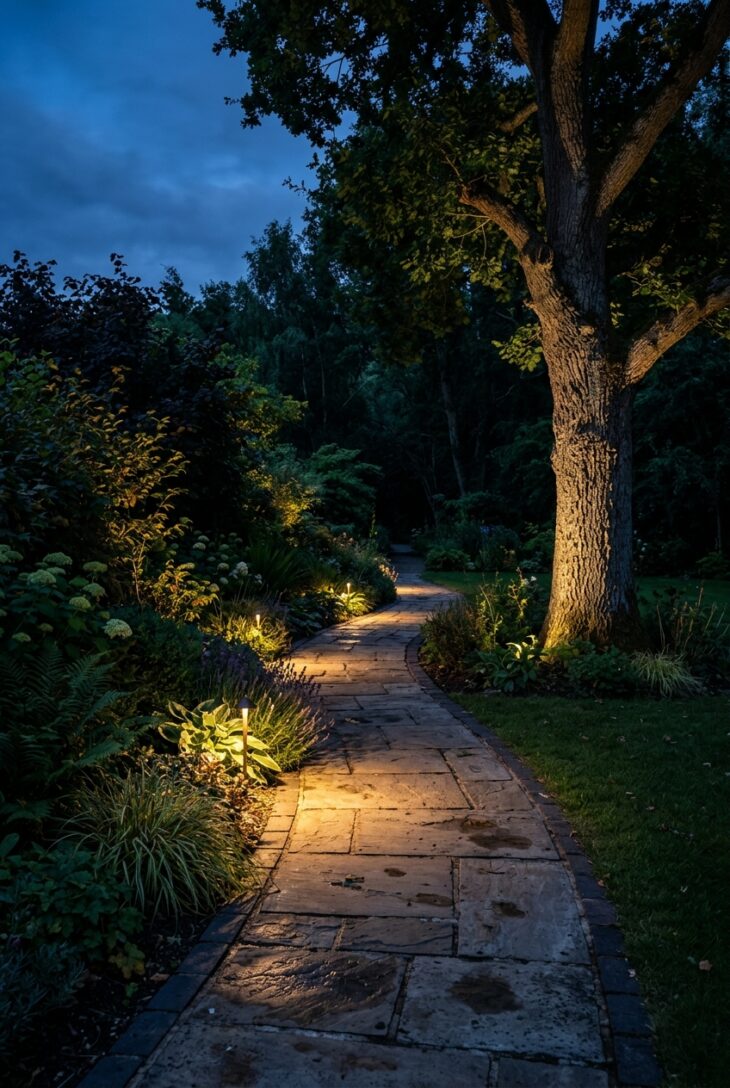
What you see The same path at dusk, but now it is a sequence of warm pools of light on the paving, thrown from small fittings hidden down in the planting. A single uplighter grazes the trunk of the tree beside it. The sky is deep blue, the far end of the path is dark, and the garden looks twice the size it does at noon.
Why it works Light the path, not the garden. Pools of light with dark between them give a rhythm to walk to and leave enough shadow for the garden to keep its mystery, whereas a row of evenly spaced bollards flattens everything into an airport runway. It also stretches how long you use the garden by a couple of hours every evening, which is a better return than most planting.
How to get it Use a low-voltage 12V system, which you can install yourself safely and extend later, and choose warm white fittings at 2700K, never the cold blue-white that makes planting look dead. Aim for fewer, better fittings: light one side of the path only, stagger them, and leave gaps of 6 to 10ft (2 to 3m) of darkness between pools. Hide the fitting itself down in the planting so you see the light and not the lamp, and angle it across the path rather than up into anyone’s eyes. Add one uplighter on a tree or a wall for a vertical accent, and put the whole thing on a timer or a dusk sensor.
21. Break a Slope With Timber Steps
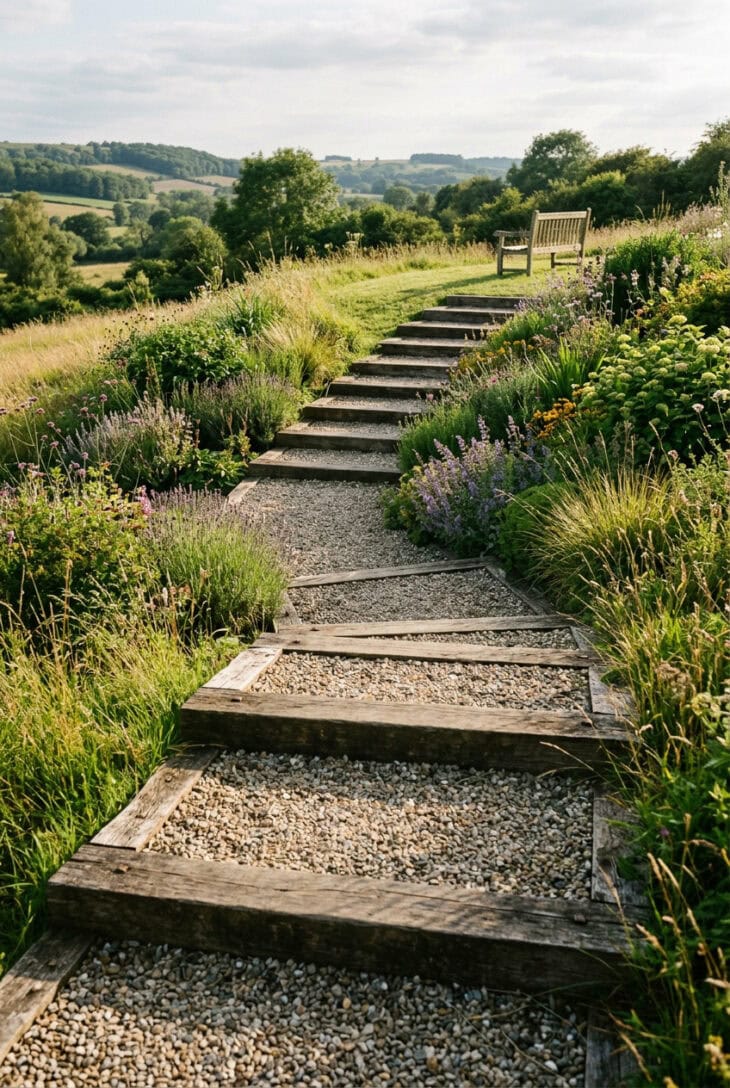
What you see Wide shallow steps cut into a grassy bank, each riser a heavy timber sleeper pinned into the ground, each tread filled with compacted gravel. They climb generously between shrubs and grasses toward a bench at the top. There is no handrail and no need for one, because the steps are so shallow you barely register them as steps.
Why it works Timber and gravel steps are perhaps a tenth of the cost of stone ones and infinitely more forgiving on an uneven bank, because each step can be set to the ground rather than the ground being reshaped to the step. Making them wide and shallow rather than narrow and steep is what turns a functional climb into part of the walk. And by cutting the slope into landings, you stop rainwater running the whole way down the hill in one go.
How to get it Work out the total rise, divide it into equal risers of 5 to 6in (13 to 15cm), and never mix riser heights, since an uneven step is where people fall. Outdoor treads want to be deep, at least 15in (38cm), and the shallower the riser the deeper the tread should be. Use oak or larch sleepers or pressure-treated timber rated for ground contact, pinned with 3ft (90cm) steel rebar driven through pre-drilled holes into the ground. Fill the treads with compacted hardcore topped with 1in (25mm) of gravel, and make the whole flight at least 4ft (120cm) wide, because a narrow flight of steps up a bank looks like a fire escape. It is the practical core of most backyard garden plans on a hill.
22. Set a Pebble Mosaic Into the Path
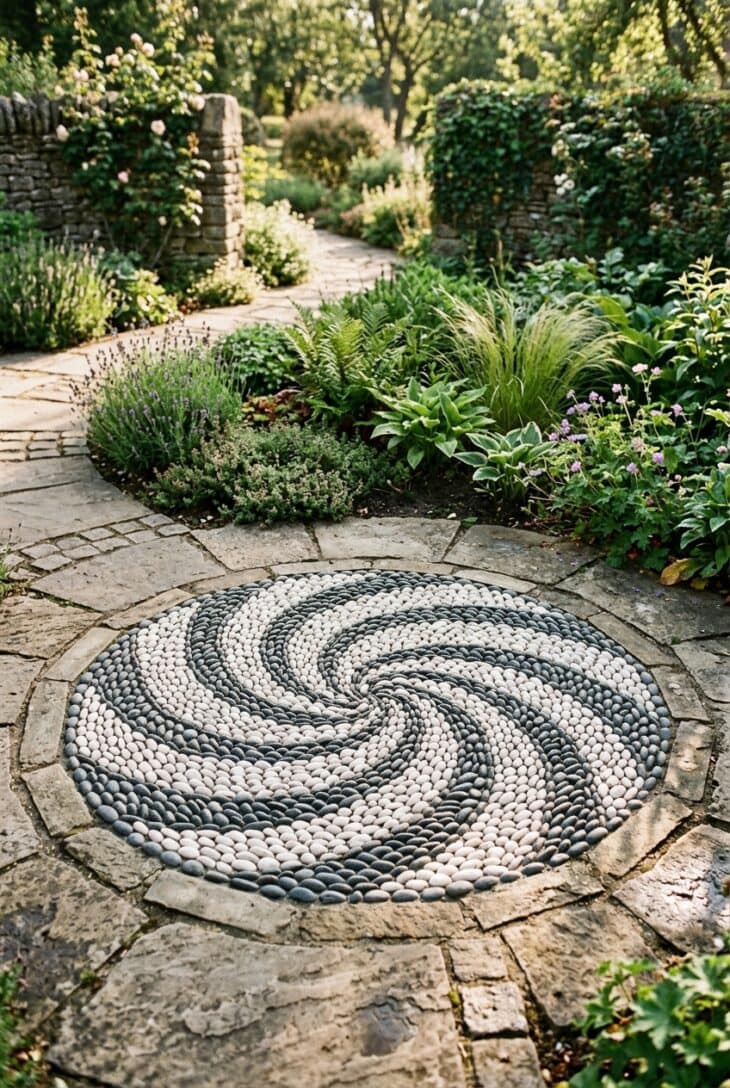
What you see A circle of pebble mosaic set into an otherwise plain stone path: hundreds of small dark and white pebbles, laid on edge, spiralling out from the centre. Raking light catches the top of every stone. It is the one spot on the path where somebody obviously spent a very long time.
Why it works Detail earns attention, and attention is what a garden is made of. A single mosaic panel at a junction, a doorway or the centre of a turning circle stops you exactly where you should be stopping and looking around. It costs almost nothing in materials, since pebbles are cheap, and everything in patience, which is precisely the trade a small garden should make.
How to get it Sort your pebbles by size and colour first, into buckets: this is most of the job and skipping it guarantees a muddled result. Work in a shallow timber frame over a compacted base, dry-lay the pattern on sand to test it, then lay for real on a semi-dry mortar bed, pushing each pebble in on its edge, not flat, to at least two thirds of its depth. Keep the surface level with a board laid across the frame. Do a small area at a time (about 12in / 30cm square per session before the mortar starts to go off), then mist and brush a dry mortar mix into the gaps. Keep the pattern simple, since a spiral or concentric rings read far better than an ambitious picture.
23. Working Paths Between the Vegetable Beds
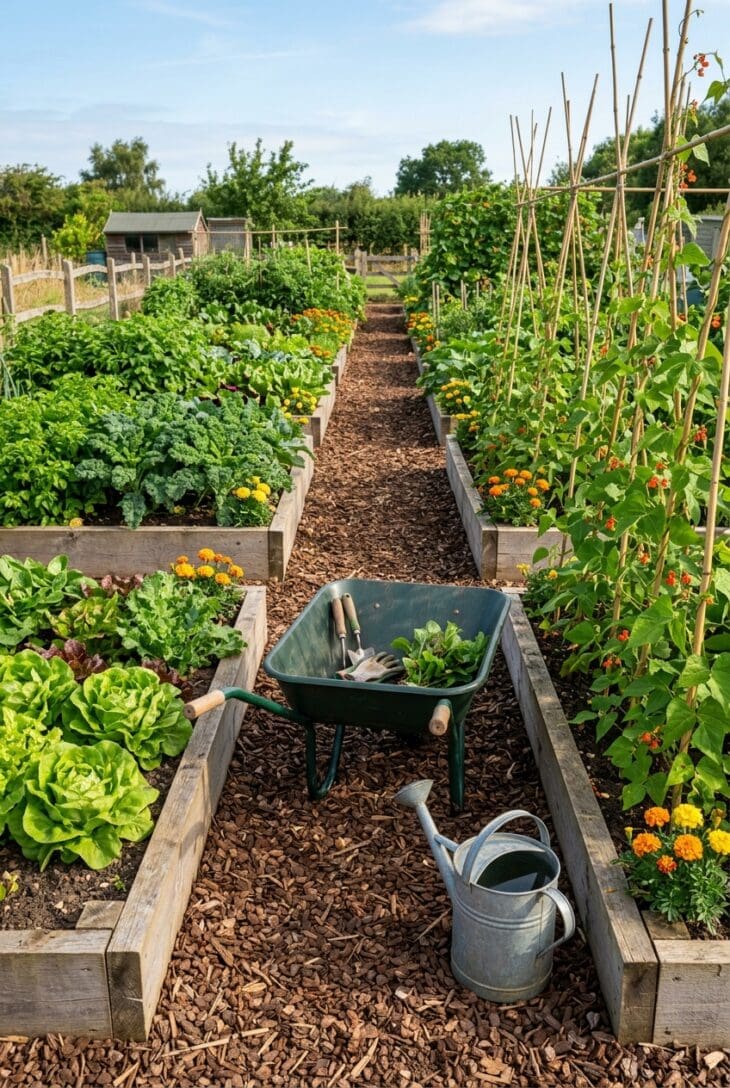
What you see Broad bark paths running in straight lines between timber raised beds full of lettuce, kale and beans up canes, with marigolds at the corners. A wheelbarrow stands on one of the paths, which is the whole test of whether it is wide enough. Everything is squared off and everything is reachable.
Why it works In a vegetable garden the path is not decoration, it is the machine. Getting the widths right is what decides whether you enjoy growing food or resent it, because a path you cannot turn a barrow on will annoy you every single week for years. Keeping all foot traffic on the paths also keeps the soil in the beds uncompacted, which is the entire argument for raised bed growing in the first place.
How to get it Make the main path 36in (90cm) minimum, wide enough for a loaded wheelbarrow with your knuckles clear, and the secondary paths between beds 18 to 24in (45 to 60cm), which is enough to kneel in. Keep beds to 4ft (120cm) wide so you can reach the middle from either side without standing on the soil. Bark or wood chip is the standard surface (cheap, soft to kneel on, easy to top up), over a membrane, but grass paths need mowing, get muddy at the ends and are a poor choice unless you like mowing. Lay a hard slab surface only for the main route to the shed. These are the bones of any productive vegetable garden, and they are worth an hour with a tape measure before you build anything.
24. A Fern and Hosta Walk in Deep Shade
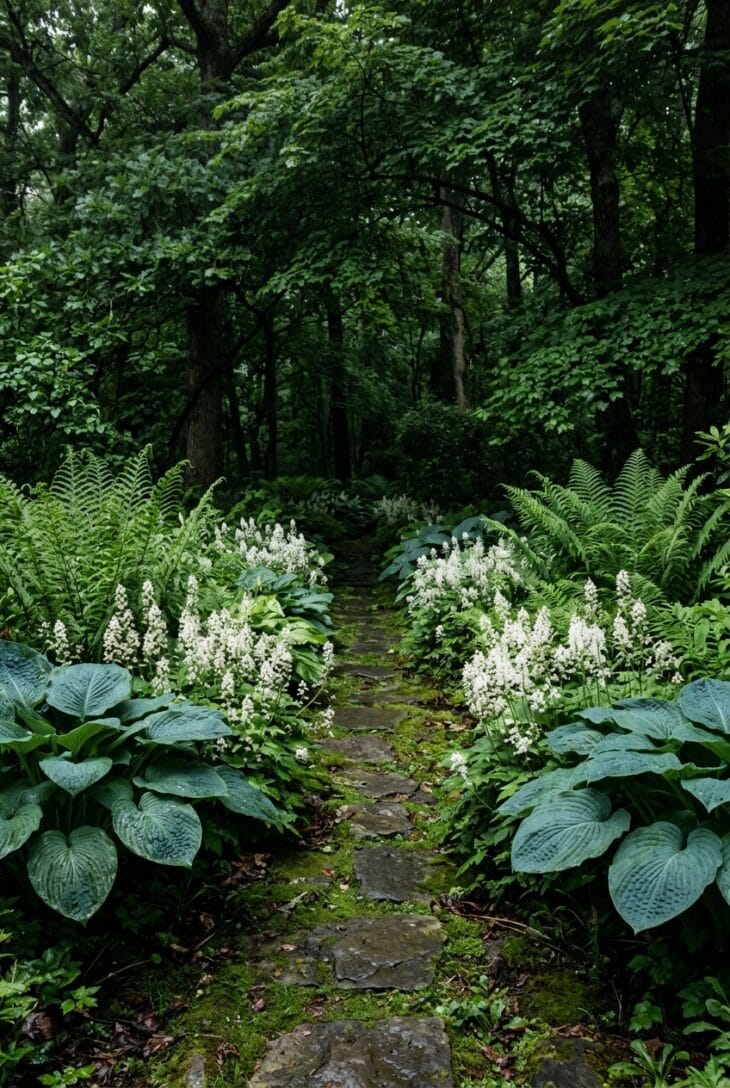
What you see A narrow stone path threading through the deepest shade in the garden, hemmed in by big blue-green hostas, ferns unfurling above head height at the back, and drifts of white foamflower glowing faintly in the gloom. It is cool, damp and quiet. On a hot day it is the only place anyone wants to be.
Why it works Deep shade defeats most planting but it suits foliage perfectly, and a path is what makes a foliage planting worth having, because these are plants you need to be close to. The trick is to lean into the darkness rather than fight it: use white flowers and pale variegation, which is what reads in low light, and let leaf shape rather than colour do the work. Big paddle-shaped hosta leaves against fine ferny texture is the entire composition.
How to get it Improve the soil first, since dry shade under trees is the real enemy, not the shade itself: dig in leaf mould or compost and mulch 3in (8cm) deep every spring. Plant hosta (‘Halcyon’ for blue, ‘Patriot’ for white edges), shuttlecock fern (Matteuccia struthiopteris) where it is damp, hart’s tongue fern (Asplenium scolopendrium) where it is dry, and foamflower (Tiarella cordifolia) as ground cover. Slugs will find the hostas, so use a gritty mulch or copper rings, or grow the thick-leaved blue varieties, which they mostly leave alone. Keep the path narrow, 30in (75cm), because the enclosure is what makes it feel like a walk in a wood.
25. Decomposed Granite for a Dry Climate
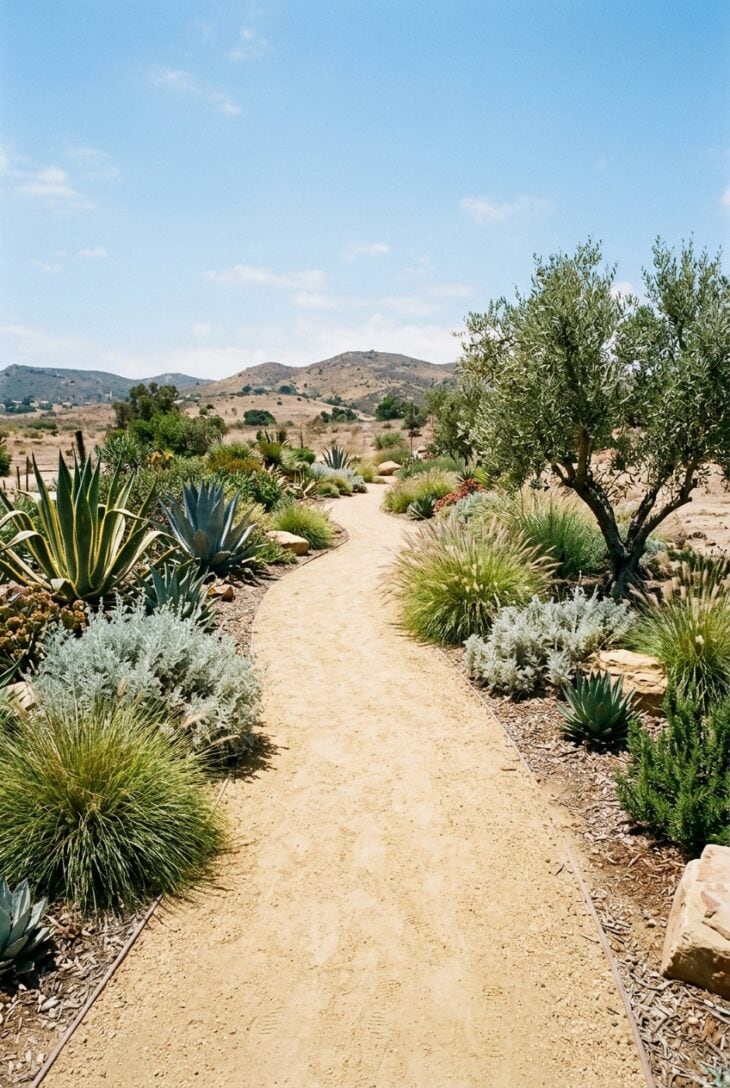
What you see A wide, firm, buff-gold path that looks like a well-made sandy track, compacted hard enough to take a bike, running between agaves, silver artemisia and grasses. It has no edging that you can see and no joints. It reads as ground rather than as construction, which in a dry garden is exactly right.
Why it works Decomposed granite gives you the informality of gravel with a firm, level, wheelchair- and barrow-friendly surface, because the fines within it bind when compacted. It is permeable, so rain soaks in rather than running off, and its warm neutral colour flatters the greys and silvers of drought-tolerant planting in a way that grey gravel never quite manages.
How to get it Ask for decomposed granite with fines, not washed DG, since the fines are what make it bind. Excavate 6in (15cm), compact a 3in (8cm) base of crushed rock, then lay the DG in two 1 1/2in (4cm) lifts, wetting and plate-compacting each one. A stabilised DG (with a resin or lime binder) resists rutting and washout far better, and is worth the extra on any slope. Crown the surface very slightly so water sheds off it. Expect to re-compact and top up a thin layer every few years, and accept that it tracks indoors on shoes, which is the price of the look.
26. Run a Path Right Around the Lawn
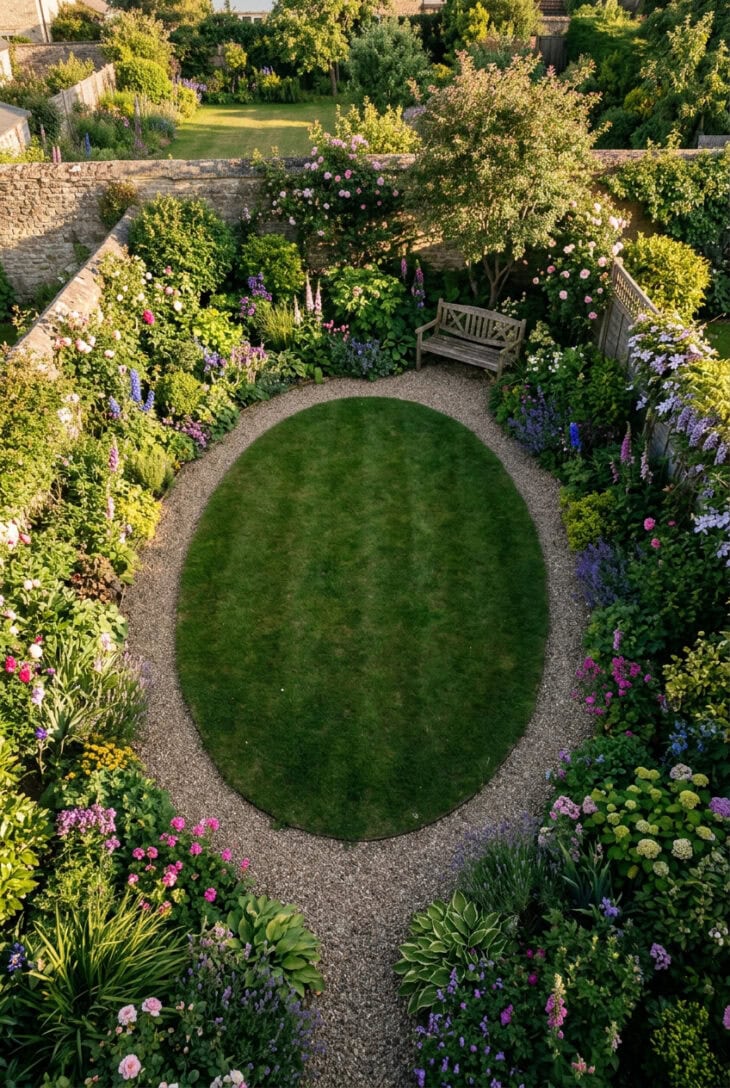
What you see A narrow path that loops the whole way around a central oval of lawn, with the borders outside the loop rather than around the edges of the plot. There is a bench at the far corner. You can walk a complete circuit of a garden that is thirty feet long, and somehow it takes a while.
Why it works A circuit path is the oldest trick for making a small garden feel larger, and it works for two reasons: it gives you more garden to walk than the plot contains, and it hides the boundaries by putting planting between you and the fence at every point. Curving the lawn into an oval or a circle also disguises the rectangle of the plot, so you stop reading the shape of the fence and start reading the shape of the lawn.
How to get it Draw the lawn shape first and let the path follow it, rather than drawing a path and leaving whatever lawn is left. Keep the path modest, 24 to 30in (60 to 75cm), since this is a walking route, not a thoroughfare, and every inch you give it comes off the borders. Make the borders outside the loop as deep as you can bear, at least 4ft (120cm), because shallow borders are what make a garden look small. Break the circuit with a bench and a wider paved area at one point, so it has a pause in it, and lay it in something quiet: gravel, brick, or mown grass if you like mowing.
27. Edge It Properly With a Brick Soldier Course
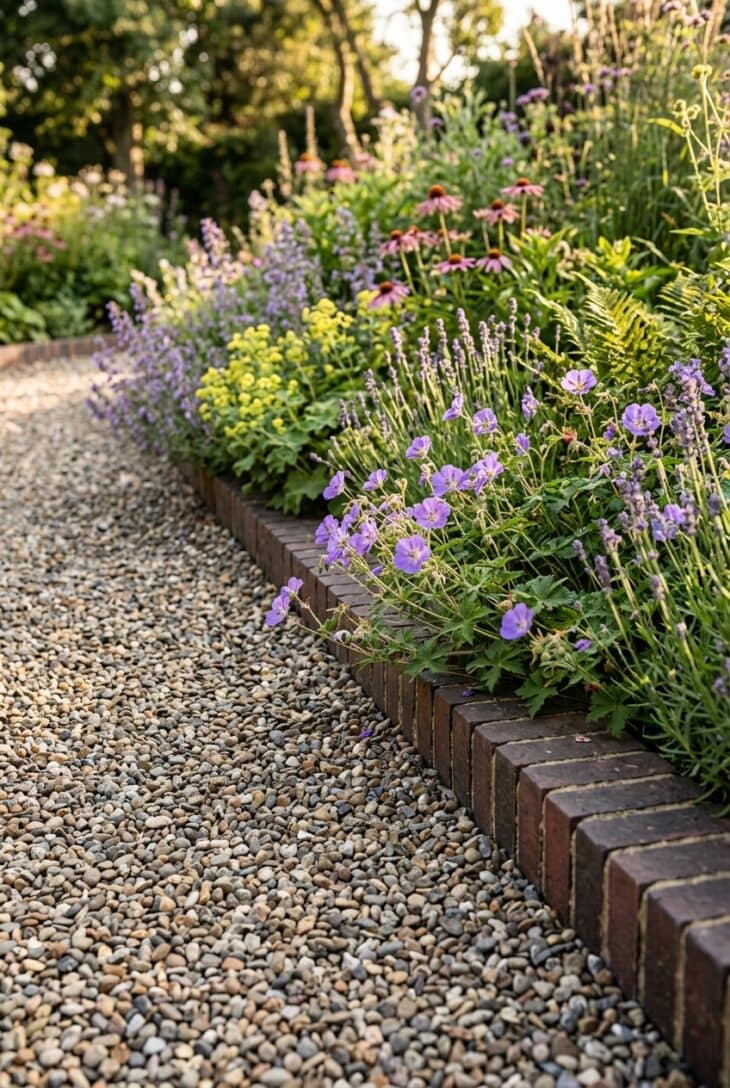
What you see A low view along the edge of a gravel path, where a row of bricks stands on end like soldiers, holding the line between the gravel and the border. The bricks sit just proud of the gravel. Perennials lean toward them from the border side. It is a small detail and it is the difference between a path and a mess.
Why it works Nearly every failed garden path failed at the edge. Gravel spreads, soil creeps in, grass invades, and within two years the crisp line you laid has gone soft and grey. A proper edge is a physical barrier that keeps each material where it belongs, and it also gives the eye a clean line to follow, which is what makes a path read as deliberate. A brick soldier course does this while looking like part of the garden rather than a plastic strip.
How to get it Dig a trench along the path edge, lay 3in (8cm) of concrete in the bottom, and stand the bricks on end in it, tight against each other, with a haunch of concrete behind them so they cannot tip. Set them about 1/2in (12mm) proud of the path surface, which is enough to hold gravel and low enough to mow over on a lawn side. Use a string line and check the level every few bricks, since the eye is merciless about a wavy edge. Frost-resistant clay pavers only. If brick is not the language of your garden, the same job is done by steel strip (invisible and modern), timber (cheap, lasts about ten years), or a mown grass edge cut with a half-moon iron every spring.
28. Narrow the Path to Stretch the View
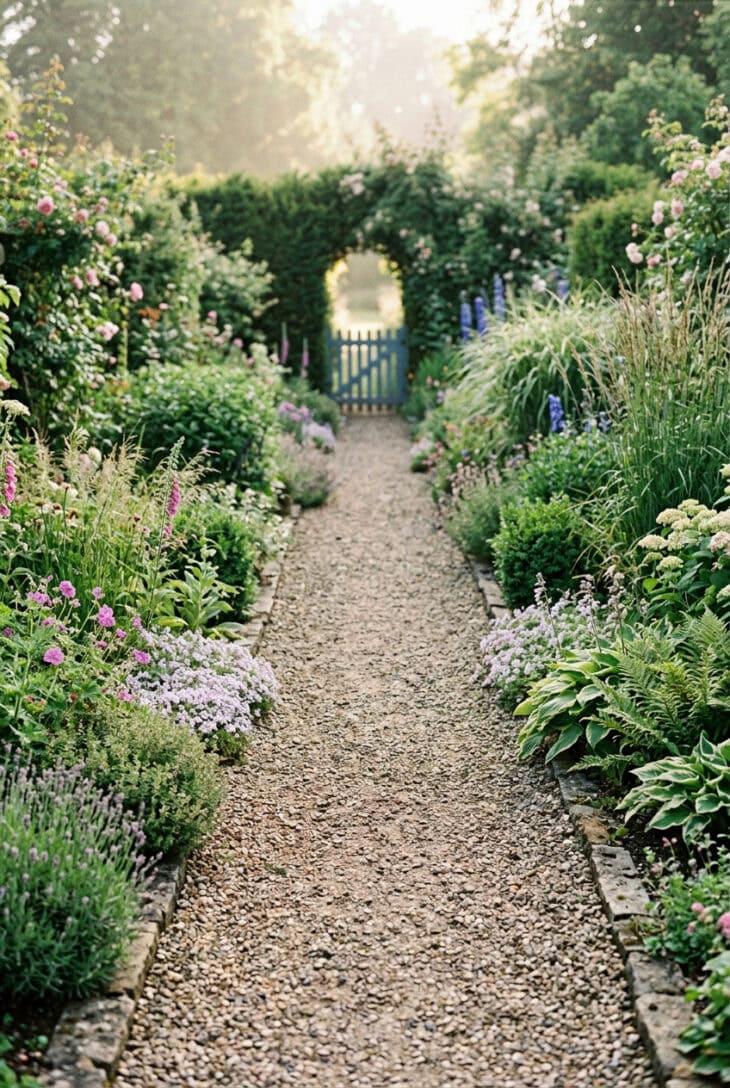
What you see A straight path that is generous where you stand and visibly narrower at the far end, where a small blue gate waits. The planting either side grows taller and finer as it recedes, and the far end is slightly hazy. The garden looks a good deal longer than the tape says it is.
Why it works Perspective tells us that things get smaller as they get further away, so if you make things smaller, the brain concludes they are further away. Tapering the path exaggerates the vanishing point; using a slightly undersized gate, or finer-textured, greyer, hazier planting at the far end, pushes the same illusion further. It is theatre, and it is completely convincing from the fixed viewpoint you design it for, which is usually the back door.
How to get it Decide the viewpoint first (stand at the door), then taper the path from, say, 4ft (120cm) at the near end to 30in (75cm) at the far end, over its whole length. Keep the taper gentle and even so nobody consciously notices it. Reinforce it with planting: bold, coarse, warm-coloured leaves near you; fine, small, grey and blue leaves at the distance. Put something slightly small in scale at the end (a narrow gate, a small bench, a modest urn). Be aware that the effect reverses when you walk back toward the house, which is a fair trade if the view from the house is the one you look at every day.
29. Put the Path Where People Actually Walk
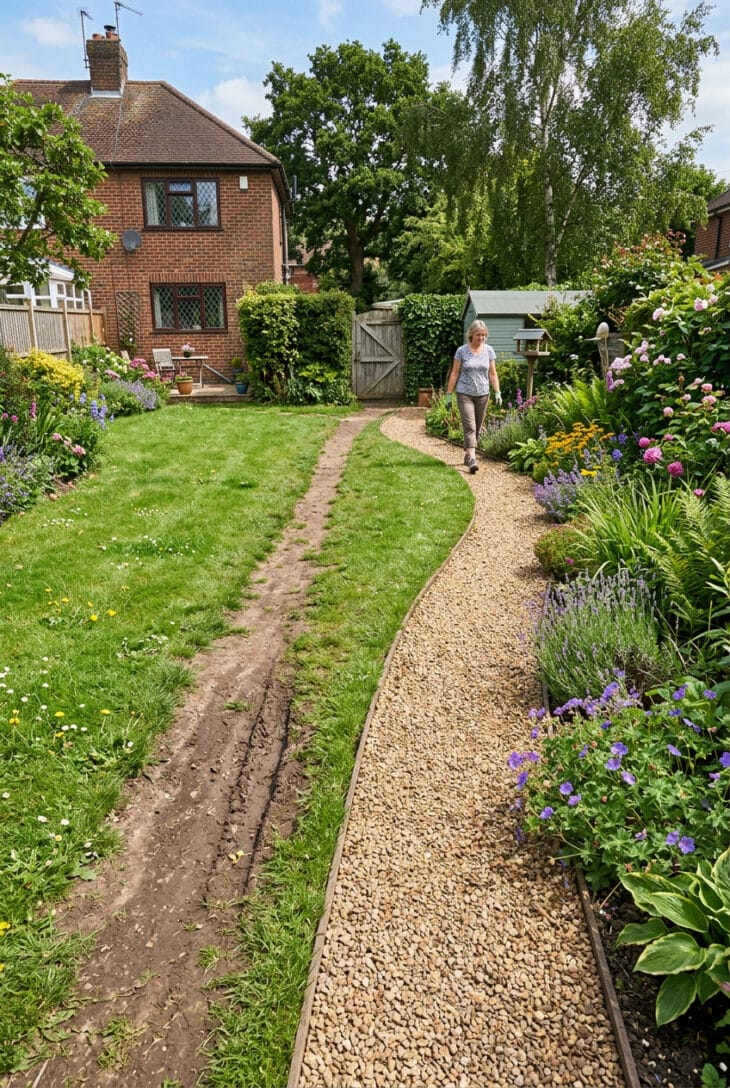
What you see The worn brown line across the grass that everyone in the house has been making for years, cutting the corner between the back door and the shed. And then the same line, rebuilt properly: a curved gravel path exactly where the feet went, with planting either side. Nothing has been fought with. Everything works.
Why it works Landscape architects call this a desire line, and the rule is simple: if people are already walking somewhere, that is where the path goes. A path laid against the way people move is a path they will step off, and no amount of design authority will stop them; you will simply get a worn line beside your beautiful new paving. Building the path along the desire line is free information you have already collected.
How to get it Before you draw anything, go and look at the grass, especially in a wet spring, since the worn lines are the truth. If the garden is new, live in it for a season and watch where everyone walks, or lay temporary stepping stones and see which ones get used. Then lay the path along that route and only refine it: soften a corner, widen a pinch point, add a bend around a tree. If you genuinely need the route to change, you have to make the alternative easier than the shortcut, which means blocking the cut with something solid (a shrub, not a low hedge) at the same time as you make the new path direct and inviting. Working with the traffic is a lot cheaper than working against it.
30. Make Sure It Works in Winter
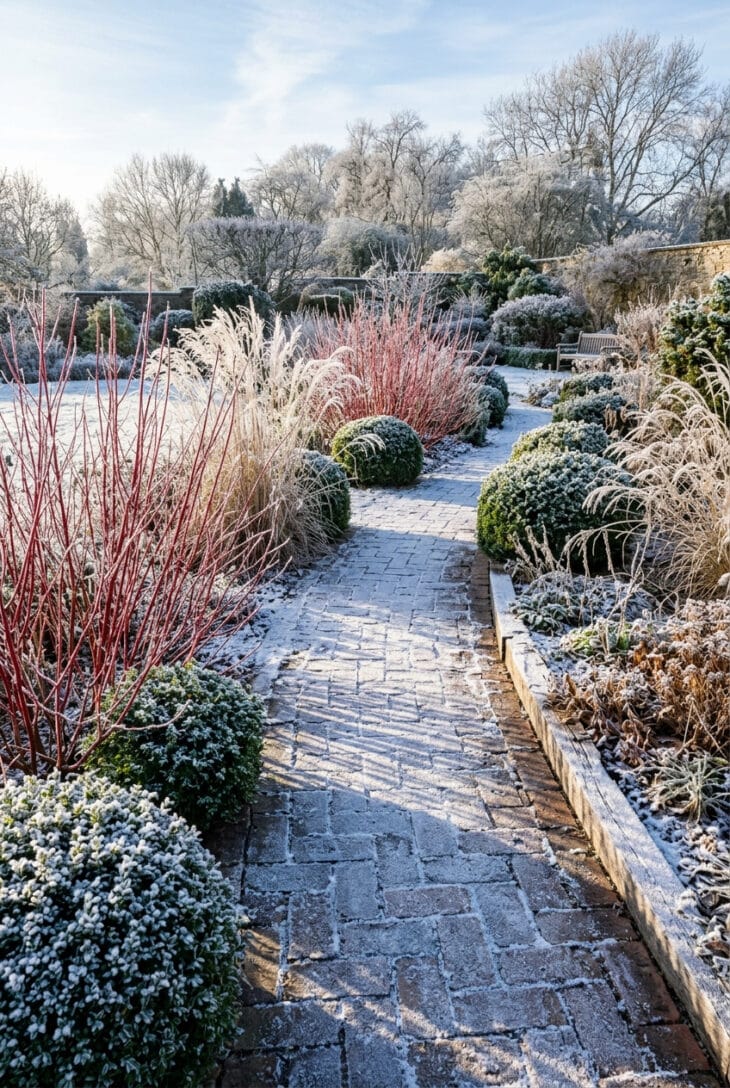
What you see The path in January: frosted brick, clean and dry and walkable, running between clipped evergreen domes, the red stems of dogwood and the standing seedheads of grasses. Low pale sun, long blue shadows. It is not the path’s best month, and it is still one of the better views of the year.
Why it works A path is the only part of a garden you have to use in February, and most are designed entirely for June. Winter is where a path is tested: whether it drains, whether it grows algae, whether the surface is safe on a frosty morning, and whether there is anything to look at while you walk it to the bins. Getting those four right is worth more over a year than any planting decision.
How to get it Fall the surface at 1 in 60 to one side so water never sits on it, since standing water is what freezes and what feeds algae. Choose textured surfaces over polished ones for the routes used daily, and keep smooth wet-prone materials (riven stone in shade, timber, log slices) for the paths you only walk in summer. Scrub the main path once in autumn with a stiff brush and a path cleaner, before the algae establishes rather than after. Then give yourself something to see: evergreen structure, a plant with winter stems such as dogwood (Cornus sanguinea ‘Midwinter Fire’), grasses left standing until March, and a scented shrub such as winter box (Sarcococca confusa) planted where you will brush past it in the dark. It is the last idea here and it is the one that will change your February.